Disclosure: This post contains affiliate links. As an Amazon Associate, we earn from qualifying purchases at no extra cost to you.
If you’re on video calls every day, overhead room lighting almost always makes you look tired, shadowed, or washed out on camera. A dedicated desk lamp fixes this in minutes: it fills in the shadows under your eyes and chin, evens out your skin tone, and makes you look noticeably more alert and professional. The key specs to look for are adjustable brightness and adjustable color temperature (neutral white, around 3500-4000K, works best for most people), not just raw wattage.
Quick Picks
- Best Overall: Double-Sided LED Panel Desk Lamp with Knob Remote
- Best Clamp-On: Clamp-Mounted Double-Sided LED Panel Lamp
- Best Budget Pick: USB-Powered Adjustable LED Desk Lamp
- Best for Small Desks: Harlowe Sol 5 Spectra Mini Light
1. Double-Sided LED Panel Desk Lamp with Knob Remote — Best Overall

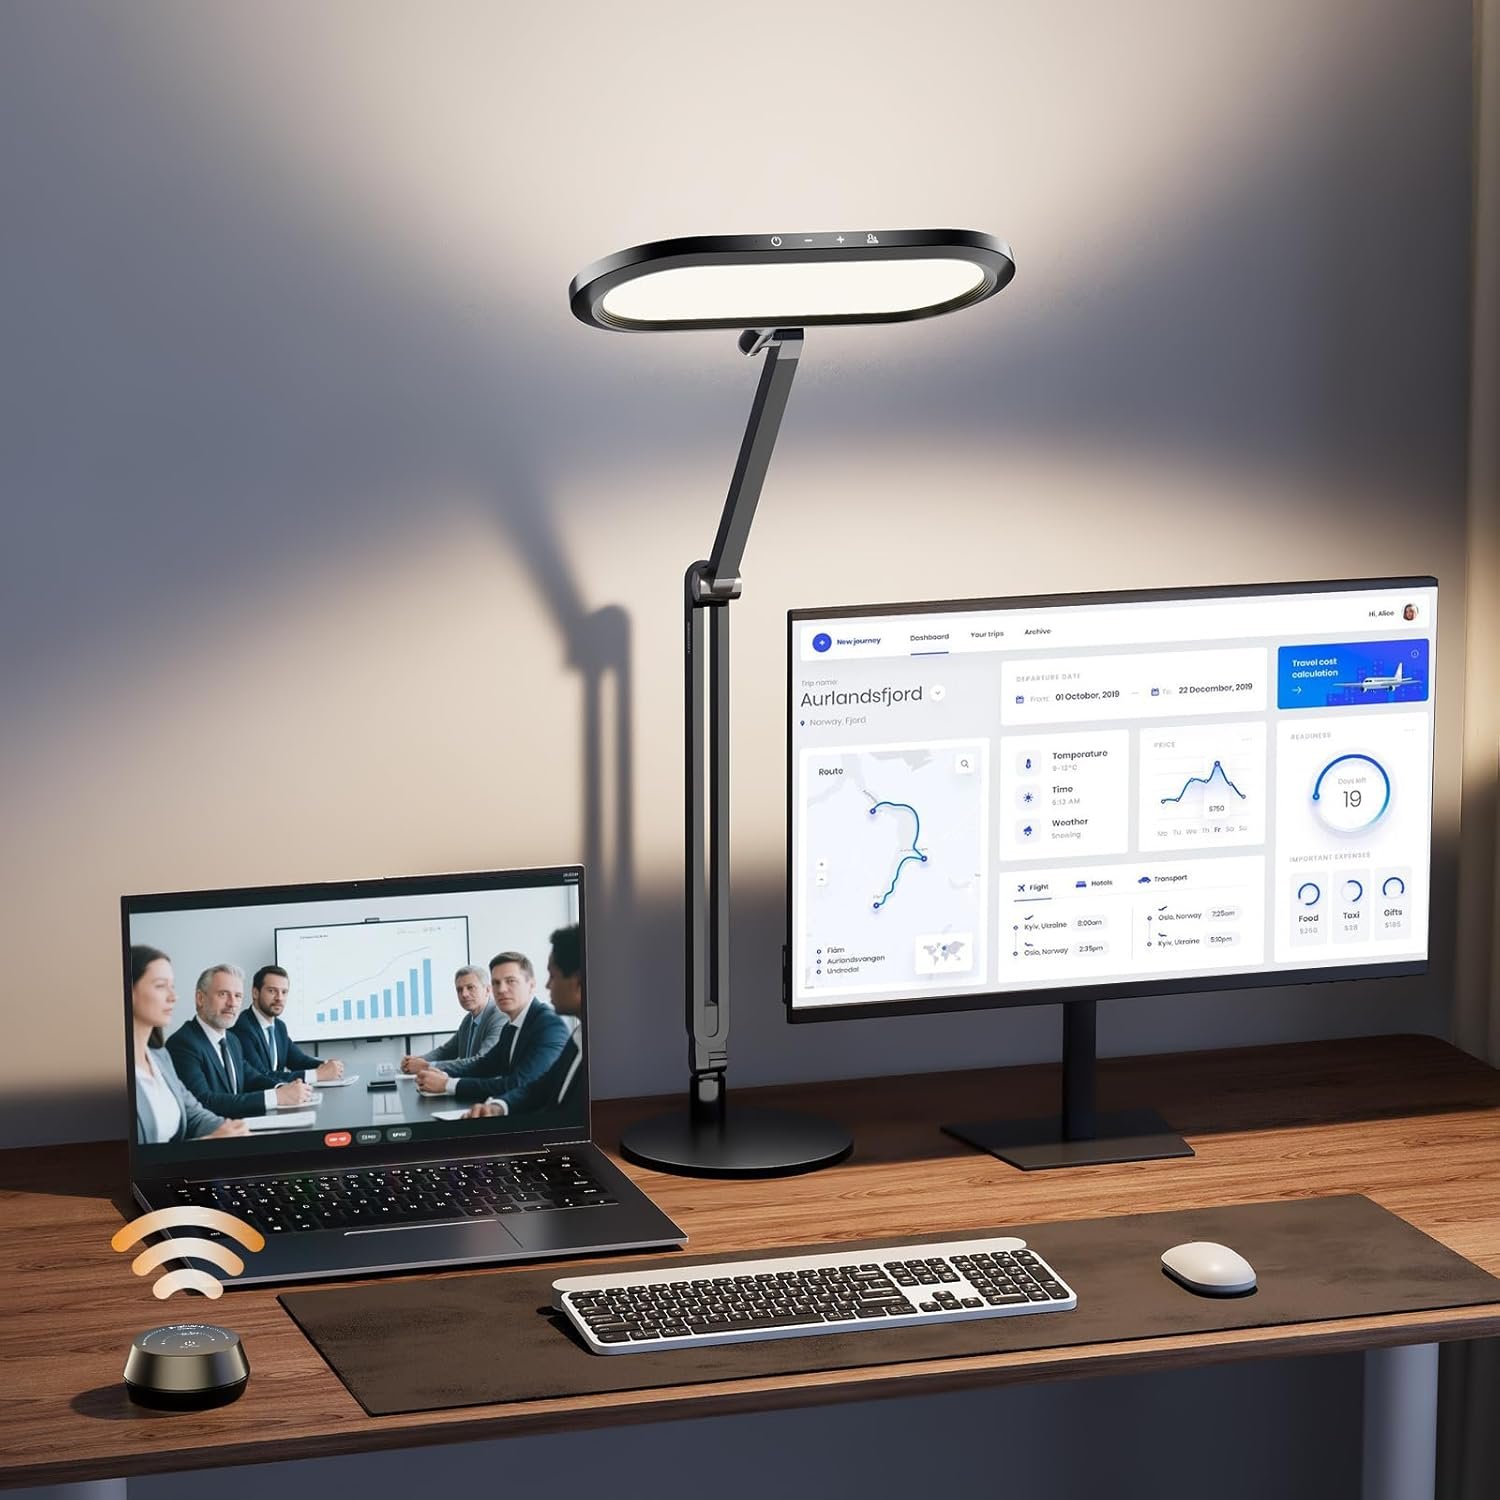
This is the lamp that consistently gets called the best option for video calls, and once you see it in action it’s easy to understand why. Its double-sided LED panel produces a soft, wraparound light that erases harsh shadows and gives a natural, 3D-lit look instead of the flat, blown-out glare of a single-panel ring light. A knob-style remote gives stepless control over both brightness and color temperature, so you can fine-tune the light mid-call without fumbling for tiny buttons. The base is heavy metal, so it stays put once positioned.
Good for: anyone who’s on video calls regularly and wants the most natural, professional-looking light. Watch out for: it’s heavier than a standard desk lamp, so it’s not something you’ll want to move around often.
2. Clamp-Mounted Double-Sided LED Panel Lamp — Best Clamp-On

This is the clamp-mounted sibling to the top pick, with the same soft, double-sided, shadow-erasing light in a space-saving format. Instead of taking up desk real estate with a base, it clamps to the edge of your desk or shelf, freeing up the entire surface. It keeps the same knob remote for precise, stepless brightness and color temperature control.
Good for: small or cluttered desks where every inch of surface space matters. Watch out for: needs a desk edge thin enough for the clamp to grip; check the clamp’s maximum thickness before buying.
3. USB-Powered Adjustable LED Desk Lamp — Best Budget Pick

You don’t need to spend much to get a noticeable upgrade over overhead room lighting. This simple lamp runs off USB power, so it plugs straight into a laptop or power bank, adjusts for height and angle, and offers a handful of color modes to switch between warmer and cooler light. It’s straightforward and effective, without any complicated setup.
Good for: budget-conscious buyers or anyone who wants a simple secondary lamp. Watch out for: the light spread isn’t as wide or evenly soft as the panel-style lamps, so you may get slight hotspots if you’re not positioned well.
4. Evershop Ring Light— Best for Small Desks

If desk space is genuinely tight, this tiny light sits on a mini tripod that fits unobtrusively in a corner. It’s a comparatively low-power 5W LED putting out around 220 lumens, not enough for a professional video shoot, but plenty for a Zoom call. It’s built from aircraft-grade aluminum rather than plastic, and can even attach to the back of a phone for calls taken on mobile.
Good for: tiny desks, dorm setups, or anyone who also takes calls from their phone. Watch out for: the low output means it won’t do much in a very dark room without at least some ambient light.
How to Choose the Right Video Call Lighting
- Color temperature matters more than brightness. Neutral white light, roughly 3500-4000K, is generally recommended for video calls. Too warm (2700K) looks yellow and dim on camera, too cool (5000K+) looks harsh and blue.
- Diffused, wraparound light beats a single hard source. A double-sided panel or diffused ring light fills in shadows evenly. A single small bulb aimed directly at your face tends to create harsh shadows on one side.
- Position it in front of you, not behind. The light should sit facing you, ideally slightly above eye level, not behind your webcam or overhead where it casts shadows downward across your face.
- Adjustability saves you from buying twice. A lamp with both brightness and color temperature control adapts to morning light, evening light, and different rooms, so you won’t need a second lamp for different conditions.
FAQ
Do I really need a separate lamp if my room has good lighting? If your room already has bright, even, front-facing light, you may not need one. But most rooms have overhead or side lighting that creates shadows on camera, which a dedicated lamp corrects in a way room lighting usually can’t.
Should I get a ring light or a desk lamp? Ring lights give a very even, shadow-free look and are popular with streamers, but can create a visible reflection in glasses. A double-sided panel lamp gives similarly soft light with less of that reflection issue, which is why it’s a common choice for daily video calls.
Where exactly should I place the lamp? Position it in front of you and slightly above eye level, angled down toward your face. Placing it too low can create an unflattering upward-lit look, and placing it directly behind your screen can wash out the camera.
Final Verdict
If you’re serious about how you look on camera, the double-sided LED panel lamp with a knob remote is worth the investment, it’s the closest thing to studio-quality lighting for a home desk. If desk space is at a premium, the clamp-mounted version gives you the same light without eating into your workspace. For an easy, low-cost upgrade, the USB-powered lamp is a solid starting point. And if your desk is genuinely tiny, the Harlowe Sol 5 Spectra fits almost anywhere.