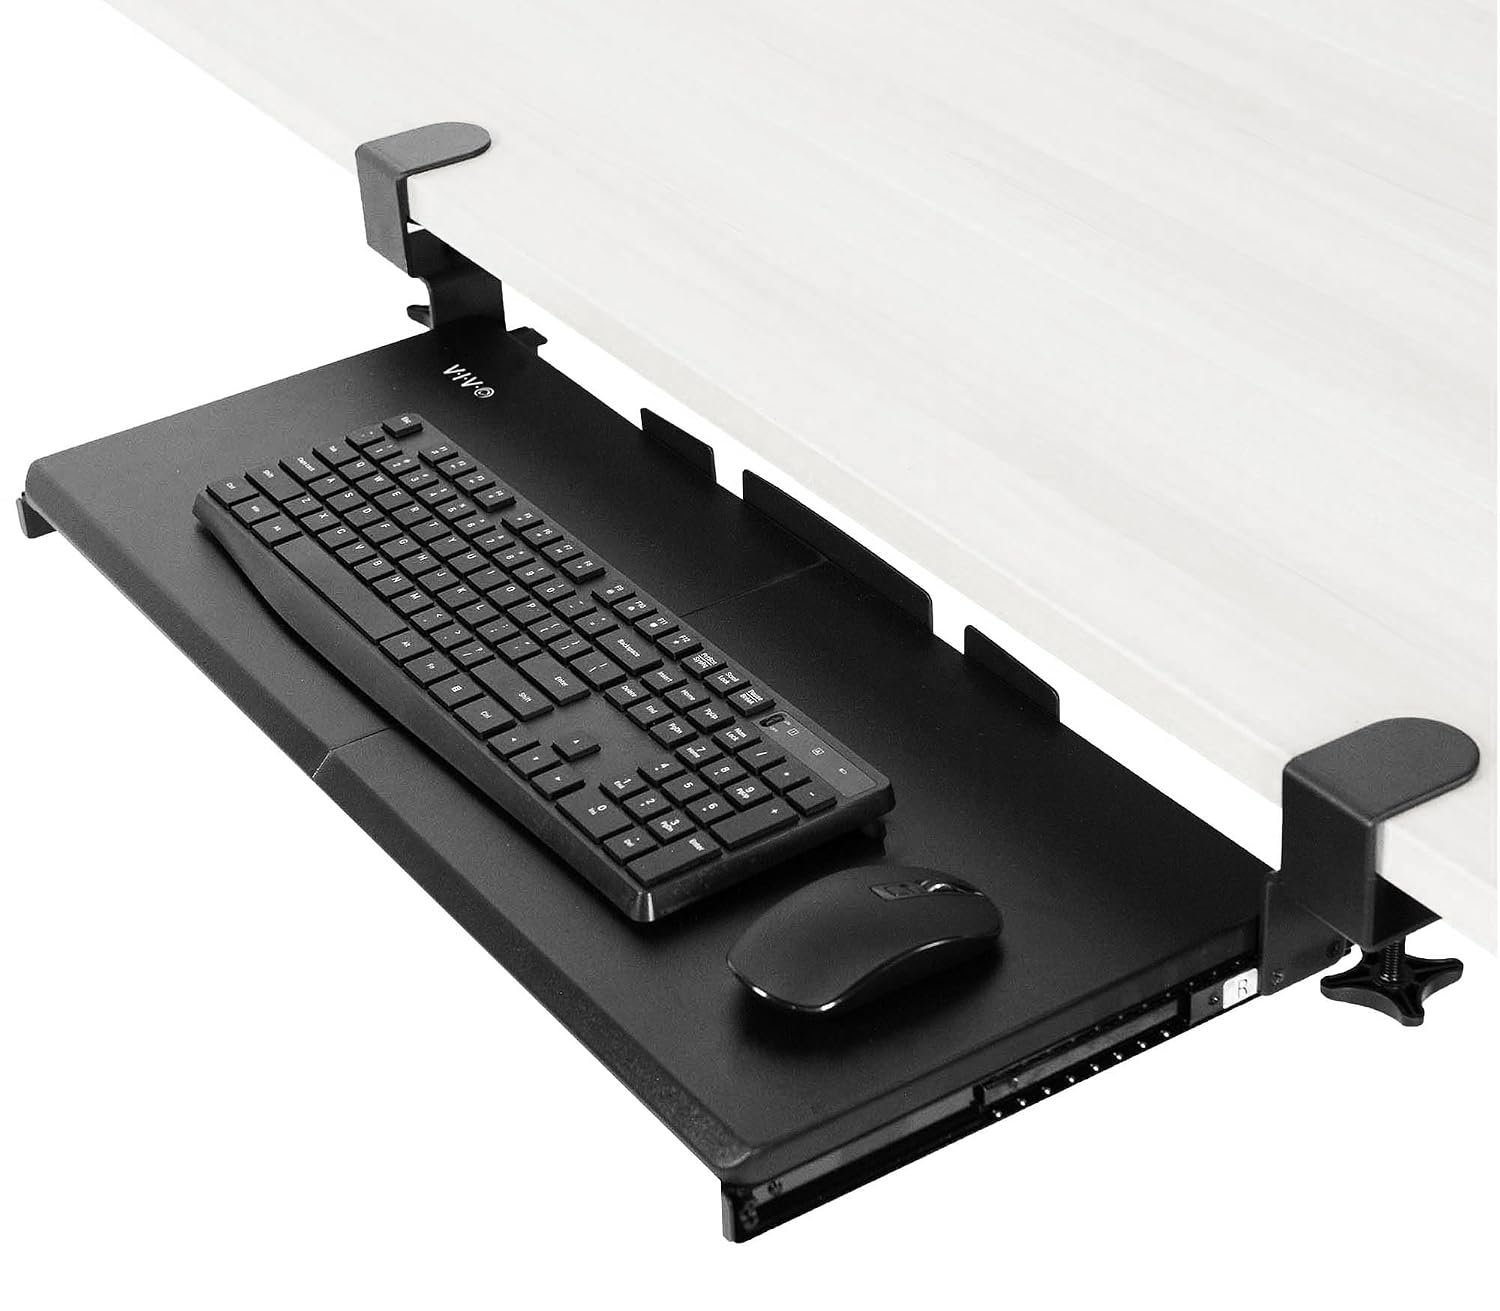
Best Under-Desk Keyboard Trays for Ergonomic Typing

Disclosure: This post contains affiliate links. As an Amazon Associate, we earn from qualifying purchases at no extra cost to you.

Typing directly on your desk surface forces your wrists into an awkward, bent-up angle for hours a day, which is a fast track to wrist strain and carpal tunnel discomfort. An under-desk keyboard tray fixes this by dropping your keyboard and mouse to the correct ergonomic height, letting your forearms stay level and your wrists neutral. It also frees up your actual desktop for a bigger monitor, notes, or just breathing room.

Quick Picks

  • Best Overall: VIVO Clamp-on Keyboard Tray
  • Best Budget Pick: BONTEC Under Desk Keyboard Tray
  • Best Full-Motion: VIVO Under Desk Swivel Keyboard Tray
  • Best for Large Setups: VIVO Extra Large Clamp-on Keyboard Tray

1. VIVO Clamp-on Keyboard Tray— Best Overall

VIVO Clamp-on Keyboard Tray

This is the tray that consistently comes up as the top pick for a reason: it’s an Amazon’s Choice product with over 14,000 reviews and a 4.4-star average, and it’s currently seeing 2,000+ purchases a month. The clamp-on C-clamp mount means no drilling into your desk, and the slide-out platform gives you a stable, roomy 27 x 11 inch surface for both keyboard and mouse. It holds up well under daily use and adjusts smoothly without the wobble that cheaper trays are known for.

Good for: anyone wanting a reliable, well-reviewed tray that just works without fuss. Watch out for: it requires a desk edge thin enough for the clamp to grip, so measure your desk thickness before ordering.

2. BONTEC Under Desk Keyboard Tray— Best Budget Pick

BONTEC Under Desk Keyboard Tray

BONTEC proves you don’t need to spend $50+ to get a solid ergonomic tray. With a 4.4-star average from over 5,600 reviews and 1,000+ bought in the past month, it’s clearly earned trust despite sitting near the bottom of the price range. The 25.6 x 11.8 inch pull-out platform comfortably fits a full keyboard and mouse, and the C-clamp mount installs in minutes without any tools beyond what’s included.

Good for: anyone on a budget who still wants a genuinely functional, well-reviewed tray rather than an unknown bargain-bin option. Watch out for: the slide mechanism feels slightly less premium than the pricier VIVO options, though it holds up fine for daily use.

3. VIVO Under Desk Swivel Keyboard Tray— Best Full-Motion

VIVO Under Desk Swivel Keyboard Tray

If you switch between typing and other desk tasks throughout the day, this VIVO model’s full swivel motion is genuinely useful. With a 4.2-star average from 2,600+ reviews and 800+ bought in the past month, it’s built around an under-desk mount that lets you rotate the entire platform out of the way when you’re not typing, rather than just sliding it in and out. The 25 x 10 inch tray is slightly more compact than the clamp-on models, which suits smaller desks.

Good for: anyone who wants to swing the tray fully out of the way for other desk work, not just slide it in and out. Watch out for: the swivel mechanism means it needs to be screwed into the underside of your desk rather than clamped, so it’s a more permanent installation.

4. VIVO Extra Large Clamp-on Keyboard Tray— Best for Large Setups

VIVO Extra Large Clamp-on Keyboard Tray

If you use a full-size keyboard with a numpad plus a mouse, or just want extra elbow room, this extra-large VIVO tray solves the cramped-tray problem entirely. It shares the same 4.4-star rating and 14,000+ review base as the brand’s standard clamp-on model, with 500+ bought in the past month, but stretches the platform out to 34 x 11 inches. The same sturdy C-clamp mount system carries over, so setup is just as straightforward as the smaller version.

Good for: anyone using a full-size keyboard, numpad, or wanting extra space for a mouse pad alongside the keyboard. Watch out for: the larger footprint needs more clearance under your desk, so measure the available space before buying.

How to Choose the Right Keyboard Tray

Mount type matters most. Clamp-on trays are the easiest to install since they grip the desk edge without any drilling, but they need a desk edge thin enough for the clamp to fit. Screw-mounted trays like swivel models are more permanent but tend to feel sturdier over time. Check the tray size against your keyboard and mouse combo before buying, especially if you use a full-size keyboard with a numpad, since compact trays can feel cramped. Finally, check your desk’s thickness and any support struts underneath, since C-clamp systems typically need a few inches of clear vertical space to grip properly.

FAQ

Will a keyboard tray fit under any desk? Most clamp-on trays work with desks between roughly 0.75 and 3 inches thick, but always check the specific product’s clamp range against your desk before ordering, especially with glass or very thin desktops.

Do I need to drill holes in my desk? Clamp-on models require no drilling at all. Screw-mounted swivel trays do require a few small screws into the underside of the desk, which is a permanent change worth considering if you’re renting or using a shared desk.

Will a keyboard tray actually help wrist pain? A properly positioned tray helps by keeping wrists in a neutral, level position instead of angled upward, which is a common contributor to strain. It’s not a substitute for a proper ergonomic assessment if you have existing wrist or hand issues, but it’s a solid preventive step for most people.

Final Verdict

If you just want a tray that works well and is backed by thousands of happy buyers, the VIVO Clamp-on Keyboard Tray is the safest choice, it’s the most reviewed option here for good reason. If budget is tight, the BONTEC delivers nearly the same experience for less. Whichever you choose, the real win is getting your wrists back to a neutral position instead of typing on the desk surface itself.
How to Set Up a Home Office Under $200 (Complete Guide)

Disclosure: This post contains affiliate links. As an Amazon Associate, we earn from qualifying purchases at no extra cost to you.

You don’t need a $2,000 standing desk and a matching chair to build a home office that actually works. Most of the discomfort and clutter people deal with at a desk comes down to a handful of specific gaps: no foot support, a laptop that’s too low, tangled cables, a mouse that doesn’t fit your hand, bad lighting on calls, and nowhere to put your stuff. Fix those with the right small accessories, and you can build a genuinely comfortable setup for well under $200, using the desk and chair you already have.

This guide pulls together our full lineup of desk accessory reviews into one shopping list, organized by priority so you know what to buy first if your budget is even tighter than $200.

The $200 Home Office Budget Breakdown

  • Under-desk footrest: ~$25-35
  • Cable management (tray + clips): ~$20-30
  • Ergonomic mouse: ~$25-40
  • Desk lamp for video calls: ~$20-35
  • Seat cushion: ~$25-35
  • Desk pad: ~$15-25
  • Under-desk storage: ~$15-30
  • Total for all seven categories at budget picks: roughly $145-230, which means you can cover everything at the lower end, or pick your top 4-5 priorities if you want to stay comfortably under $200.

Priority Order If Your Budget Is Tighter

If $200 still feels like a stretch, buy in this order. Each one addresses a bigger, more common pain point than the next.

  1. Seat cushion or footrest, whichever matches your actual discomfort. Physical pain from sitting affects your whole workday, so fix this first.
  2. 2. Cable management. Cheap, fast, and immediately makes the whole desk feel calmer and safer to move around.
  3. 3. Ergonomic mouse. You touch it thousands of times a day, so a bad fit compounds fast.
  4. 4. Desk lamp for video calls. High visibility upgrade if you’re on camera regularly for work.
  5. 5. Desk pad and under-desk storage. Nice-to-haves that finish the look and keep clutter under control once the functional problems are solved.

Fix Your Feet and Posture First

If you’re on the shorter side and your feet dangle, or you sit for six or more hours a day, this is the highest-impact category on the list. A footrest fixes dangling feet, a seat cushion fixes tailbone and lower-back pressure, and either one costs less than a nice dinner out. See our full breakdown in Best Footrests for Short People and Best Seat Cushions for Long Hours at a Desk.

Tame the Cable Chaos

An under-desk tray plus a pack of adhesive clips solves most visible clutter for well under $30, and it’s the single fastest way to make a cluttered desk feel put-together. Our full guide, Best Cable Management Kits for a Clean Desk, breaks down trays, all-in-one kits, and options for standing desks.

Upgrade Your Input Devices

A mouse that doesn’t fit your hand causes fatigue you’ll feel in your thumb and wrist by mid-afternoon, especially if you have smaller hands and are using a mouse sized for an average or larger grip. This is a cheap fix that pays off every single day you’re at your desk. See Best Ergonomic Mouse for Small Hands for picks across flat, vertical, and ultra-compact shapes.

Look Better on Video Calls

If you’re in meetings regularly, overhead room lighting is almost always working against you, adding shadows under your eyes and making you look tired even when you’re not. A dedicated desk lamp fixes this in one purchase. Our guide, Best Desk Lamps for Video Calls (Zoom Lighting), covers panel lamps, clamp-ons, and budget picks.

Finish the Look and Add Storage

Once the functional problems are solved, a desk pad protects your desk and gives your keyboard and mouse a defined home, while under-desk storage clears the small items that pile up on top of the desk. Both are inexpensive finishing touches. See Best Desk Pads for Small Desks and Best Under-Desk Storage for Small Home Offices for picks sized for compact setups.

If You Have a Little Extra Room in the Budget

If you work from bed or the couch some days, a laptop stand solves the overheating and posture problems that come with that. And if you run two monitors, a proper dual monitor stand clears desk space and gets both screens to the right height. Both categories run a bit higher than the core list above, so they’re the first things to add once your basics are covered. Check out Best Laptop Stands for Bed and Couch Work and Best Monitor Stands for Dual Monitors when you’re ready to expand.

The Bottom Line

You don’t need to buy everything on this list at once, and you definitely don’t need to spend the full $200 in one order. Start with whatever’s causing you the most discomfort right now, whether that’s dangling feet, a messy desk, or a sore wrist, and build out from there. Each guide linked above goes into the full comparison of options at every price point, so you can dig deeper into any category before you buy.

Best Under-Desk Storage for Small Home Offices

Disclosure: This post contains affiliate links. As an Amazon Associate, we earn from qualifying purchases at no extra cost to you.

The space under your desk is usually the most under-used storage in the whole house. Most people ignore it until it becomes a tangle of cords, boxes, and stray notebooks that makes the whole office feel cluttered no matter how tidy the desktop looks. Converting that dead zone into organized storage doesn’t require altering your desk or your walls, and it’s one of the highest-impact upgrades you can make to a small home office.

Quick Picks

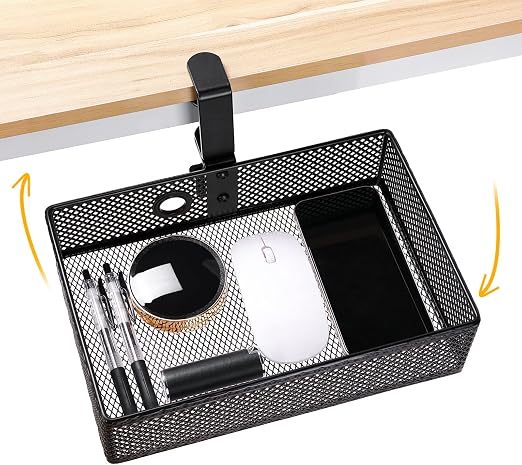
  • Best Overall: Clamp-On Slide-Out Desk Drawer
  • Best for Files: Letaya 3-Drawer Locking Mobile File Cabinet
  • Best Rolling Cart: 3-Tier Rolling Utility Cart
  • Best Budget Pick: Under-Shelf Wire Storage Basket

1. Perfect POSTURE Under Desk Drawer — Best Overall

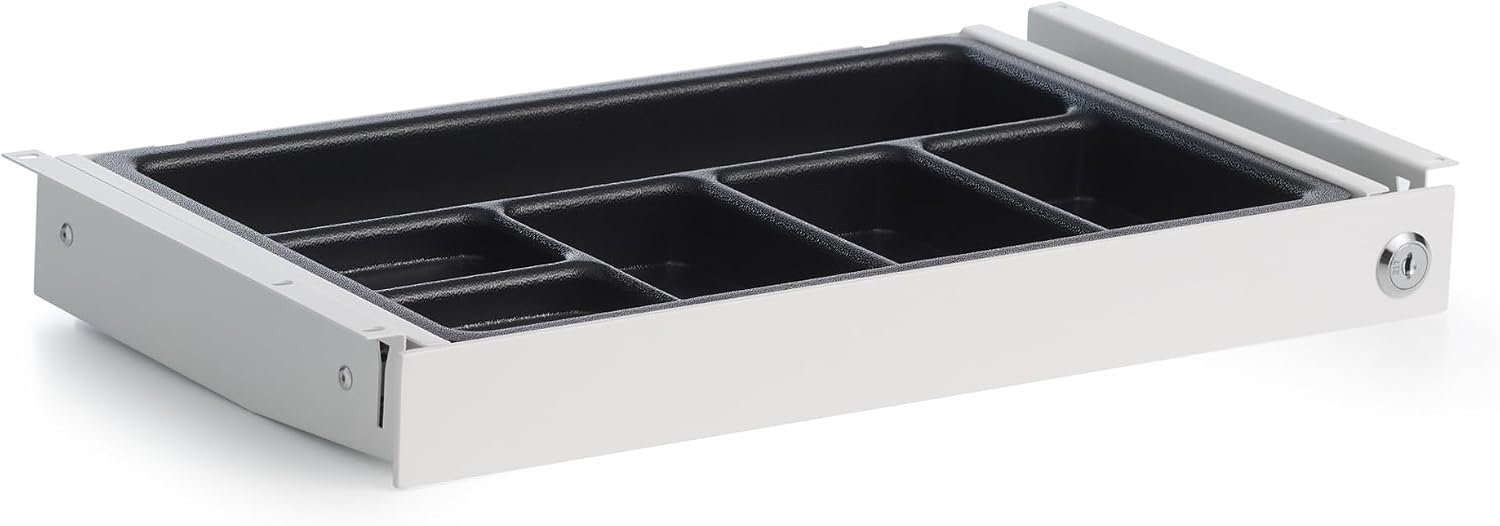
This is the easiest storage upgrade for a small office, since it adds a hidden drawer directly under your desktop without any drilling. It clamps to the underside of the desk and slides out for access to pens, chargers, notepads, and other small items you reach for constantly, then tucks away out of sight. It works on desks with roughly 0.75 to 2 inches of edge thickness, and since it doesn’t stand on the floor, it doesn’t eat into legroom the way a cart or cabinet does.

Good for: anyone who wants a drawer without drilling and wants to keep floor space completely clear. Watch out for: it only holds small, frequently-used items; larger supplies like files or printer paper still need separate storage.

2. Letaya 3-Drawer Locking Mobile File Cabinet — Best for Files

If you deal with paperwork, contracts, or anything that needs to stay both organized and secure, this rolling file cabinet solves it. Built from 0.8mm steel rather than wood, it’s more durable and moisture and fire resistant, with a hanging-file drawer that has adjustable bars to fit different folder sizes. A single lock secures all three drawers at once, and five casters (two lockable) let you roll it under the desk when working and out of the way when you need legroom.

Good for: anyone who needs secure, organized file storage that still fits under a small desk. Watch out for: it’s heavier and bulkier than drawer or basket options, so measure your under-desk clearance carefully before buying.

3. SunnyPoint 3-Tier Rolling Cart — Best Rolling Cart

A rolling cart is the most flexible option here, since open shelves work for a wider mix of items than drawers: printer, supplies, books, or a plant if you want one. Compact 3-tier carts are specifically sized to slide under most desks, and lockable casters keep it stable while in use and mobile when you need to move it out for cleaning or to reach the back of your desk.

Good for: people who want open-shelf flexibility rather than enclosed drawers, and like being able to roll storage in and out. Watch out for: open shelves show clutter more than closed drawers or cabinets, so it works best if you’re willing to keep it tidy.

4. Euyona Under Desk Basket — Best Budget

This is the cheapest way to reclaim under-desk space, and it’s a genuinely effective one for lightweight items. A simple wire basket mounts underneath the desk surface using adhesive strips or small screws, giving you a spot for notebooks, cables, or office supplies without taking up any floor space or requiring a purchase that costs more than a few dollars.

Good for: testing whether under-desk storage helps before investing in a drawer or cart, or for anyone on a tight budget. Watch out for: it lacks the premium feel and weight capacity of solid wood or metal drawers, so stick to genuinely lightweight items.

How to Choose the Right Under-Desk Storage

  • Measure your clearance first. Most desks have roughly 24-30 inches of vertical space underneath and the full width of the desktop available. Measure both before buying anything that stands on the floor, like a cart or file cabinet, so it actually fits without cramping your legs.
  • Match storage type to what you’re storing. Small, frequently-used items (pens, chargers, notepads) suit a clamp-on drawer. Paperwork and files need a proper file cabinet with hanging bars. Bulkier or varied supplies do best on open shelves like a rolling cart.
  • Consider whether you need mobility. A rolling cart or cabinet with lockable casters can move out of the way when you need full legroom, while a clamp-on drawer stays fixed but never gets in the way at all.
  • Think about security if it matters. If you store sensitive documents or valuables, a locking file cabinet is worth the extra cost over an open basket or unlocked drawer.

FAQ

Will under-desk storage fit any desk? Clamp-on drawers need a desk edge within a specific thickness range, usually 0.75-2 inches, so check that before buying. Floor-standing carts and cabinets just need enough clearance underneath, which most standard desks have.

Can I use multiple types of storage together? Yes, and it often works best that way. A clamp-on drawer for daily items plus a small rolling cart or file cabinet for bulkier supplies covers most storage needs without any single piece being oversized.

Does under-desk storage reduce legroom? Clamp-on drawers and under-shelf baskets don’t touch the floor, so they don’t affect legroom. Rolling carts and file cabinets do take up some floor space, so measure your legroom needs before choosing one of those options.

Final Verdict

For most small home offices, the clamp-on slide-out drawer is the easiest win, no drilling, no lost legroom, and it handles the small daily items that clutter a desktop. If paperwork is your main storage need, the Letaya locking file cabinet is worth the extra footprint. If you want flexible, open storage for varied supplies, the 3-tier rolling cart does the job. And if you’re not sure how much storage you actually need yet, start with the under-shelf wire basket before committing to something bigger.

Best Desk Pads for Small Desks

Disclosure: This post contains affiliate links. As an Amazon Associate, we earn from qualifying purchases at no extra cost to you.

On a small desk, a full-size desk pad can look oversized and swallow up the little surface space you have. But going without one usually means scratches on the desk, a mouse that doesn’t track well on wood or glass, and no defined spot for your keyboard and mouse. The trick with a small desk is picking a pad sized specifically for the space, not just buying “small” from the label and hoping it fits.

Quick Picks

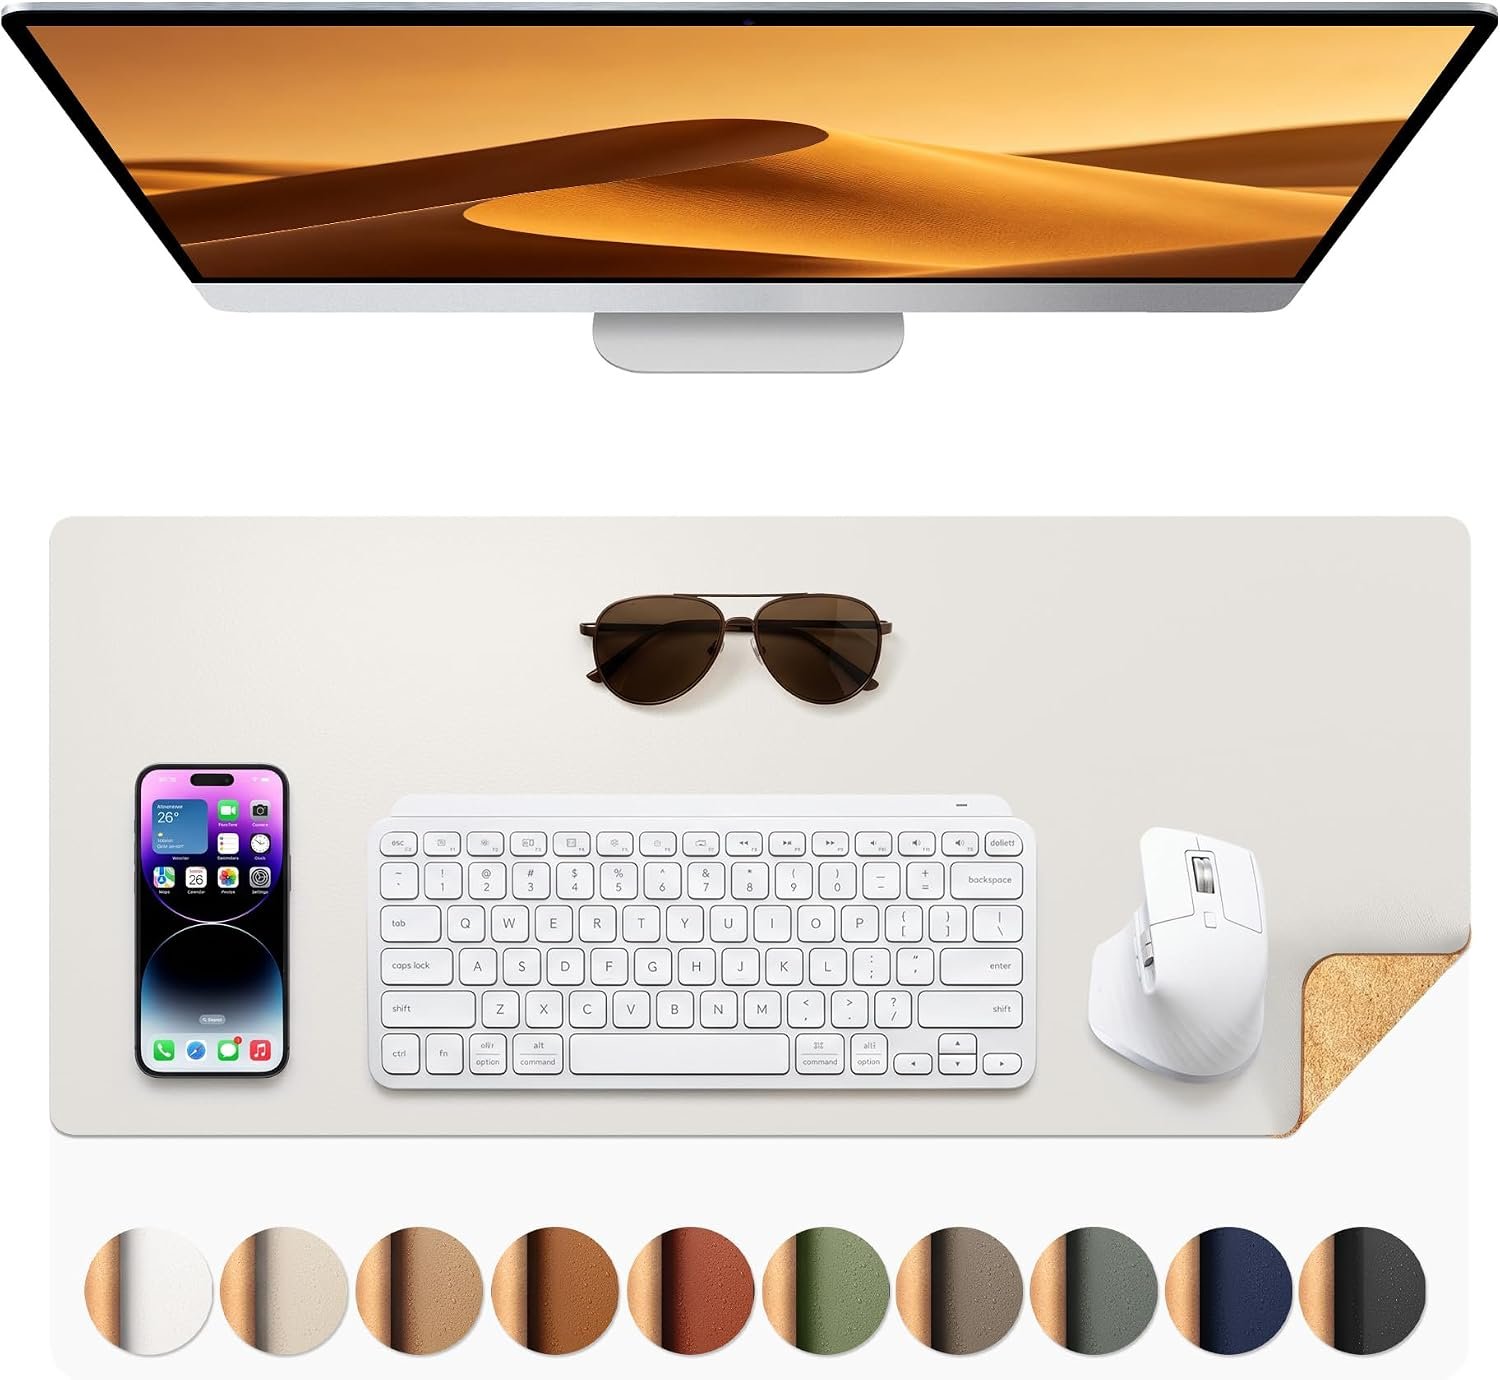
  • Best Overall: Aothia Leather Desk Pad Protector
  • Best for Gaming/Typing Feel: Corsair MM350 PRO Cloth Pad
  • Best Dual-Sided: Ysagi Dual-Sided Desk Pad
  • Best Budget Pick: BUBM Waterproof PU Leather Desk Mat

1. Aothia Leather Desk Pad Protector — Best Overall

This is the pad most people should start with. It’s a classic, unobtrusive PU leather surface that protects your desk from scratches and spills while looking clean enough for video calls. A cork underside grips wood and laminate desks so it won’t slide around, and it comes in a smaller size in addition to the standard 31.5 x 15.7 inches, which makes it easy to match to a compact desk instead of overhanging the edges.

Good for: anyone who wants a clean, professional-looking pad that just works. Watch out for: leather-style surfaces don’t offer much wrist cushioning, so if you type for hours, consider pairing it with a separate wrist rest.

2. Corsair MM350 PRO Cloth Pad — Best for Gaming/Typing Feel

If you spend hours typing or gaming and want a softer surface under your wrists, a cloth pad like this beats leather-style options for comfort. It has a micro-woven cloth top for consistent mouse tracking, a non-slip rubber base, and enough cushioning to noticeably reduce wrist fatigue over long sessions. It also looks professional enough for video calls, so it doubles well as a productivity and gaming surface.

Good for: anyone who games after hours or wants extra wrist comfort during long typing sessions. Watch out for: cloth absorbs liquid, so a coffee spill needs immediate cleaning or it will stain.

3. Ysagi Dual-Sided Desk Pad — Best Dual-Sided

A small desk often needs to serve double duty, sometimes minimal and clean, sometimes warmer and more personal, and this pad handles both by offering two different colors on each side. Flip it depending on your mood or when you rearrange your setup, no need to buy two separate pads. Both sides are waterproof, non-slip, and sized at a standard 31.5 x 15.7 inches, which fits most compact desks without excessive overhang.

Good for: anyone who likes to switch up their desk aesthetic without buying multiple pads. Watch out for: reversing it means removing everything on top first, so it’s not something you’ll flip daily.

4. Aothia Budget Desk Mat — Best Budget Pick

This is the budget default that shows up in nearly every desk pad recommendation, and for good reason: it covers the basics well without a premium price tag. Waterproof PU leather protects against spills, the surface is smooth enough for consistent mouse tracking, and it holds up fine for everyday use. It won’t have the refined feel of pricier leather pads, but it solves the core problem of protecting your desk and defining your workspace.

Good for: budget-conscious buyers who just want basic desk protection and a clean surface. Watch out for: the material feels less premium than higher-end leather pads and may show wear sooner.

How to Choose the Right Desk Pad for a Small Desk

  • Measure your desk before you measure the pad. Standard desk pads run around 31.5 x 15.7 inches, but many brands also offer a smaller size, often closer to 24 x 14 inches. Measure your available surface first and pick the closest fit rather than assuming “one size fits all.”
  • Decide what you’ll do on it. If you mostly type and browse, a smooth leather-style surface looks clean and works fine. If you game or want wrist cushioning, a cloth pad tracks more consistently and feels softer for long sessions.
  • Check for a non-slip base. Whatever material you choose, a rubber or cork underside keeps the pad from sliding around on a small desk where you’re likely to bump it more often.
  • Waterproof matters more on a small desk. Tight spaces mean drinks and devices sit closer together, raising spill risk. A waterproof surface is easy to wipe clean instead of soaking in and staining.

FAQ

Will a desk pad work with any mouse? Yes, virtually all modern optical and laser mice track fine on both leather-style and cloth desk pads. Only very glossy or reflective pads can occasionally cause tracking issues, which is rare with the matte finishes most desk pads use.

How do I clean a desk pad? Waterproof leather-style pads wipe clean with a damp cloth. Cloth pads generally need to be spot-cleaned quickly for spills, and many are machine washable for a deeper clean, though that means clearing everything off first.

Should I get a desk pad that covers my whole desk or a smaller one just for my keyboard and mouse? On a small desk, a smaller pad sized just for your keyboard and mouse area usually looks and functions better than trying to cover the entire surface, which can look oversized and leave less room for other items.

Final Verdict

For most small desks, the Aothia Leather Desk Pad Protector is the safest choice, clean-looking, protective, and available in a size that won’t overwhelm a compact surface. If you type or game for hours and want extra wrist comfort, upgrade to the Corsair MM350 PRO cloth pad. If you like to switch up your desk look, the Ysagi dual-sided pad gives you two options in one purchase. And if you’re on a tight budget, the BUBM mat covers the essentials without the premium price.

Best Seat Cushions for Long Hours at a Desk

Disclosure: This post contains affiliate links. As an Amazon Associate, we earn from qualifying purchases at no extra cost to you.

If you spend more than four hours a day sitting, you’ve probably felt the numbness, lower back stiffness, and tailbone discomfort that comes with it. That’s not just an annoyance, it’s your body signaling that pressure is building up unevenly. A good seat cushion redistributes that weight, supports your spine’s natural alignment, and can be the difference between dreading your chair and barely noticing it. Here’s what actually helps.

Quick Picks

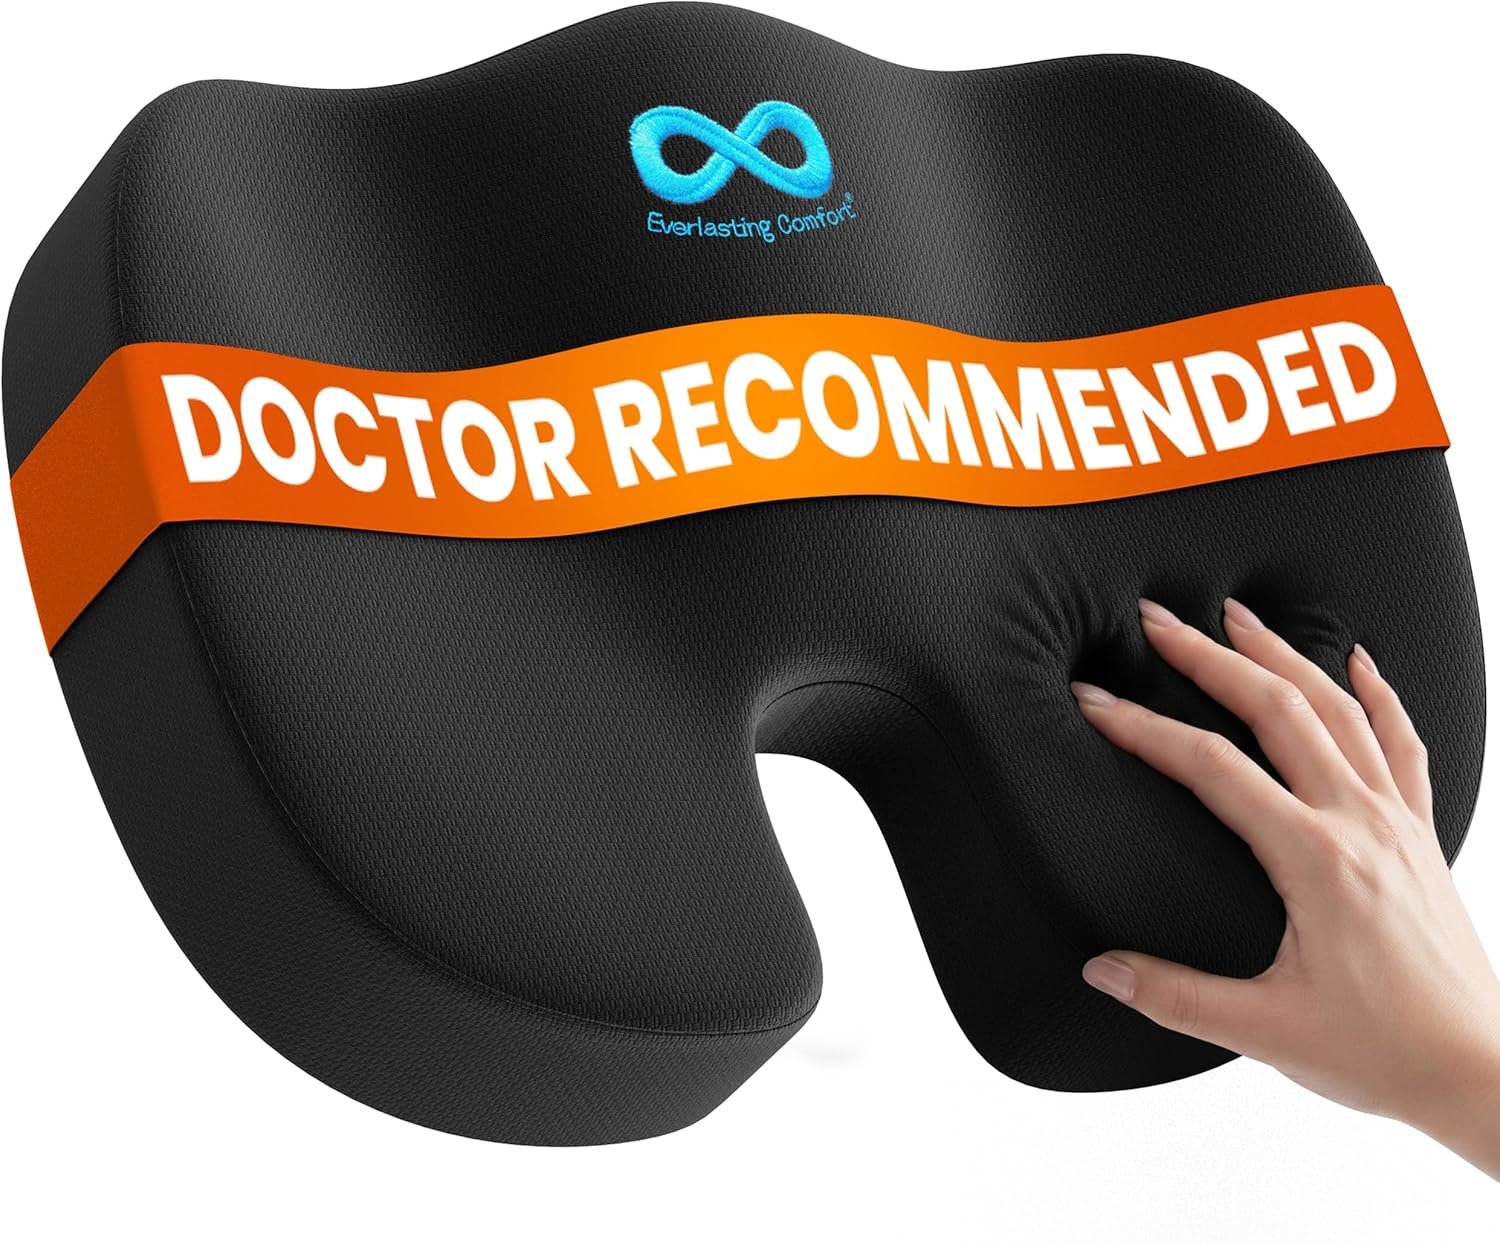
  • Best Overall: Everlasting Comfort Seat Cushion
  • Best for Tailbone Pain: ComfiLife Premium Coccyx Cushion
  • Best Cooling Option: Medline EquaGel Cushion
  • Best Budget Pick: Basic Memory Foam Coccyx Cushion

1. Everlasting Comfort Seat Cushion — Best Overall

With well over 100,000 reviews, this is the cushion most people land on first, and it earns that popularity. It’s made from 100% memory foam with a U-shaped coccyx cutout that keeps pressure off your tailbone, and a non-slip rubber base keeps it from sliding around as you move. At about 3.15 inches thick, it does raise your seated height slightly, which for most people actually helps posture by positioning the hips a bit above the knees.

Good for: anyone sitting 6-8 hours a day who wants a proven, well-reviewed all-rounder. Watch out for: the height increase can put you too close to your desk if your chair or desk is already at its limit, so check your setup first.

2. ComfiLife Premium Coccyx Cushion — Best for Tailbone Pain

If tailbone pain (coccydynia) is your specific issue, this cushion is built around solving exactly that. Its coccyx cutout is deeper and more pronounced than most budget cushions, keeping the tailbone from making contact with the seat at all. The 100% memory foam construction holds its shape noticeably longer than lower-density foam, an important detail since cheap foam cushions tend to flatten out within 6-12 months of daily use.

Good for: people with diagnosed or suspected tailbone pain who need real pressure relief in that specific spot. Watch out for: if your discomfort is more general lower-back or hip pain rather than tailbone-specific, a flatter, more evenly-distributed cushion may suit you better.

3. Medline EquaGel Cushion — Best Cooling Option

If the back of your thighs feel sweaty every time you stand up, a gel cushion solves that in a way foam simply can’t. The EquaGel design offers excellent pressure relief for larger body types especially, and the gel stays cool and resilient rather than trapping heat the way memory foam does over a long session. It’s a clinical-grade design, originally built for wheelchair and medical use, so it holds up extremely well over years of daily use.

Good for: anyone who runs hot while sitting, or larger body types who need more robust pressure distribution. Watch out for: gel cushions are noticeably heavier than foam and cost more.

4. ZZ-WELL Seat Cushion — Best Budget Pick

This is the sensible starting point if you’re not sure a cushion will even help, and you don’t want to spend much finding out. It has the same basic coccyx-cutout memory foam design as the pricier picks, a non-slip bottom that grips fabric, mesh, and hard seats, and a removable, washable cover. It won’t hold its shape quite as long as premium foam under heavy daily use, but it’s an easy, low-risk way to test whether cushioning solves your discomfort before spending more.

Good for: first-time buyers or anyone sitting under 6 hours a day who wants basic relief. Watch out for: if you sit 6+ hours daily, it will likely flatten out faster than a premium cushion and need replacing sooner.

How to Choose the Right Seat Cushion

  • Identify where your discomfort actually is. Tailbone pain (coccydynia) is localized right at the base of the spine and needs a deep coccyx cutout. Sciatica radiates from the lower back through the glute and leg, and often responds better to a larger cutout or a flat, evenly-distributed cushion instead.
  • Check stability features. A cushion that slides around while you sit defeats the purpose. Look for a non-slip rubber base or straps that anchor it to your chair, especially on mesh or leather seats.
  • Account for the height it adds. Most cushions raise your seated height by roughly 3-4cm. Check that this doesn’t push your arms too high relative to your desk or your eyes too high relative to your monitor, adjust your desk or monitor height afterward if needed.
  • Match the material to your priorities. Memory foam is the most common and generally comfortable. Gel adds cooling and extra pressure relief but costs more and weighs more. A washable cover matters more than people expect for long-term hygiene.

FAQ

Will a seat cushion actually fix my back pain? It can help significantly by improving posture and redistributing pressure, but a cushion is a complementary accessory, not a replacement for an ergonomic chair, correct desk height, and good posture habits overall. If pain persists after a few weeks, it’s worth checking your full desk setup or seeing a professional.

How long do memory foam seat cushions last? Premium, high-density memory foam typically holds its shape for 1-2+ years of daily 6-10 hour use. Budget, lower-density foam often starts flattening within 6-12 months under the same use.

Can I use a seat cushion in a car or on other chairs too? Yes, most cushions in this category are designed to be portable and work on office chairs, dining chairs, car seats, and even wheelchairs, which makes them useful beyond just the desk.

Final Verdict

The Everlasting Comfort cushion is the safest first buy for most people, it’s proven, comfortable, and handles general 6-8 hour sitting well. If your pain is specifically tailbone-related, upgrade to the ComfiLife for a deeper, more targeted cutout. If heat buildup is your main complaint, the Medline EquaGel is worth the extra cost and weight. And if you’re just testing whether a cushion helps at all, start with the basic memory foam pick before spending more.

Best Desk Lamps for Video Calls (Zoom Lighting)

Disclosure: This post contains affiliate links. As an Amazon Associate, we earn from qualifying purchases at no extra cost to you.

If you’re on video calls every day, overhead room lighting almost always makes you look tired, shadowed, or washed out on camera. A dedicated desk lamp fixes this in minutes: it fills in the shadows under your eyes and chin, evens out your skin tone, and makes you look noticeably more alert and professional. The key specs to look for are adjustable brightness and adjustable color temperature (neutral white, around 3500-4000K, works best for most people), not just raw wattage.

Quick Picks

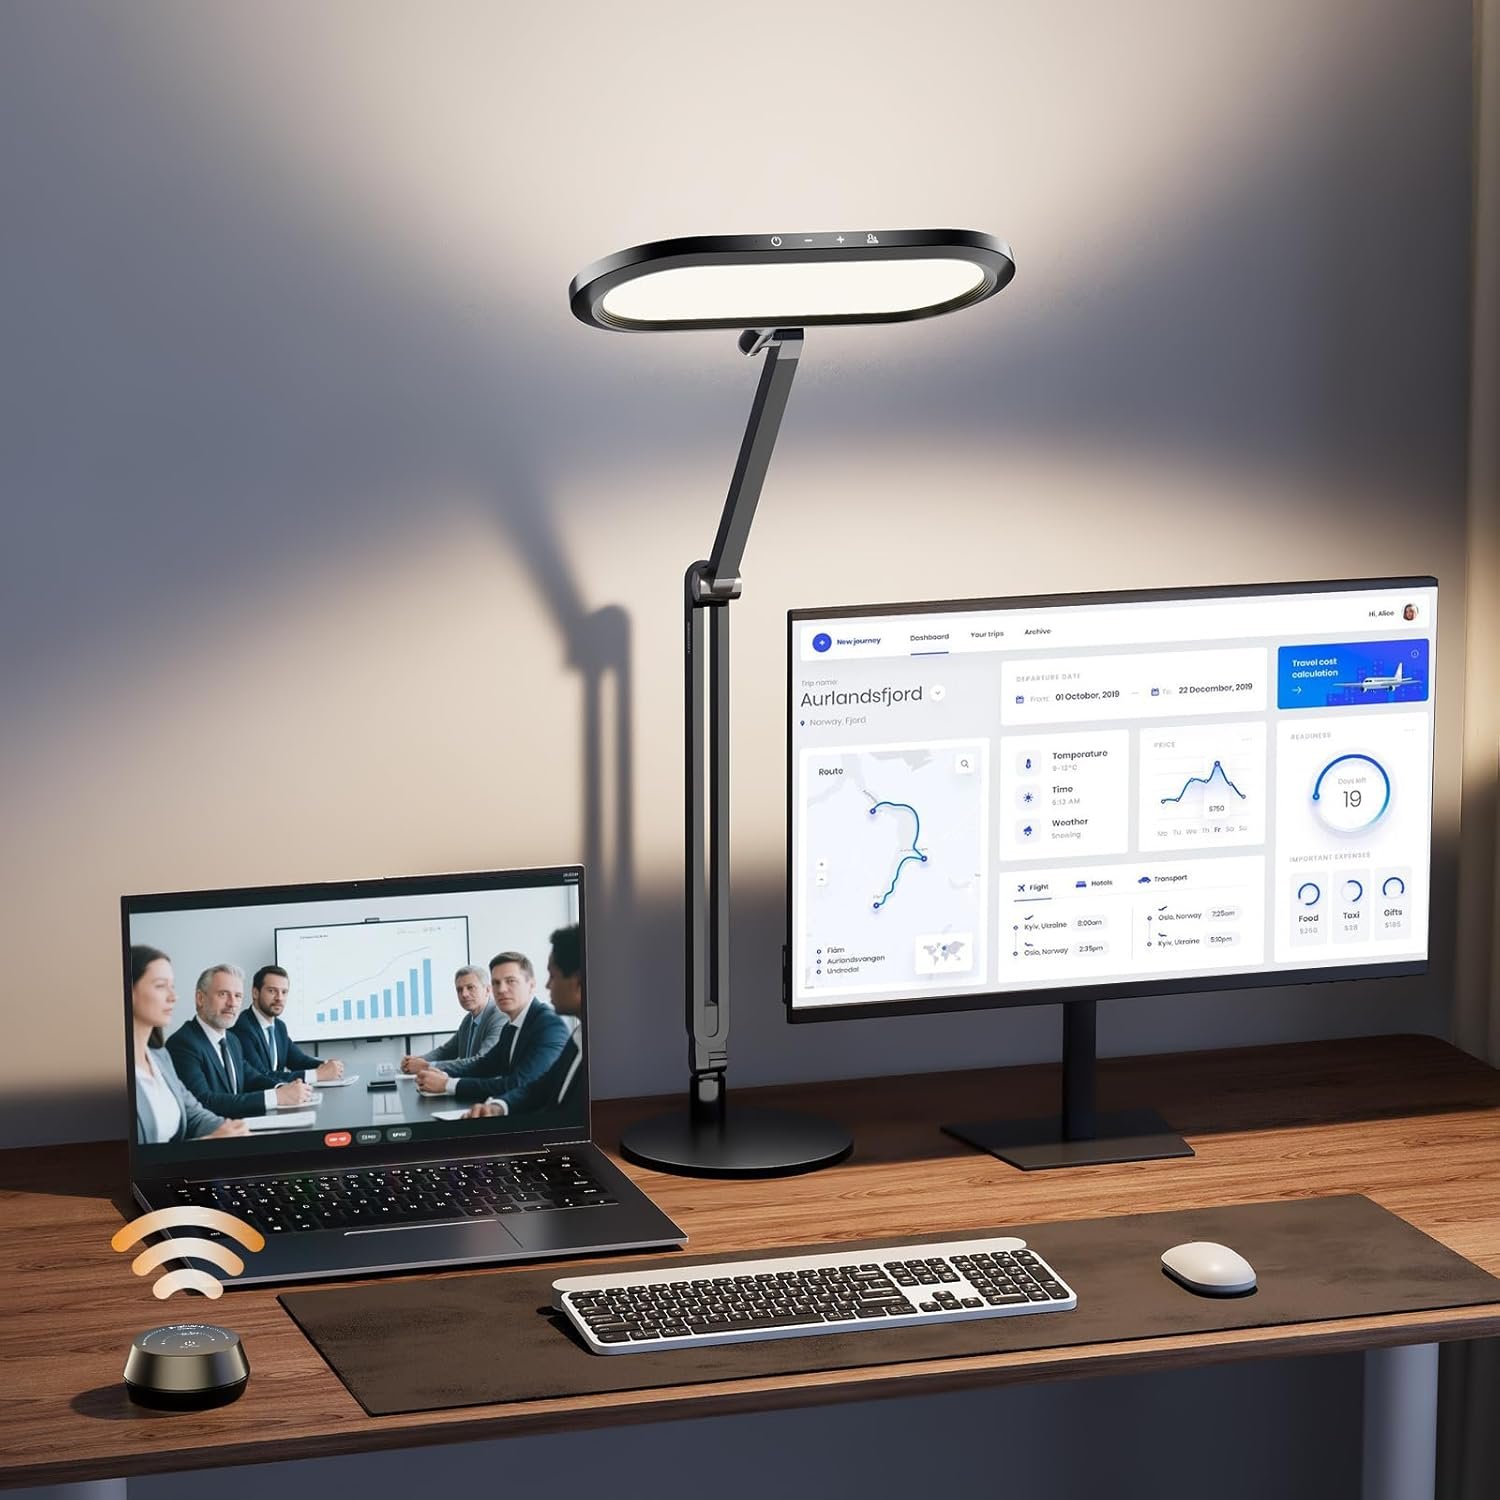
  • Best Overall: Double-Sided LED Panel Desk Lamp with Knob Remote
  • Best Clamp-On: Clamp-Mounted Double-Sided LED Panel Lamp
  • Best Budget Pick: USB-Powered Adjustable LED Desk Lamp
  • Best for Small Desks: Harlowe Sol 5 Spectra Mini Light

1. Double-Sided LED Panel Desk Lamp with Knob Remote — Best Overall

This is the lamp that consistently gets called the best option for video calls, and once you see it in action it’s easy to understand why. Its double-sided LED panel produces a soft, wraparound light that erases harsh shadows and gives a natural, 3D-lit look instead of the flat, blown-out glare of a single-panel ring light. A knob-style remote gives stepless control over both brightness and color temperature, so you can fine-tune the light mid-call without fumbling for tiny buttons. The base is heavy metal, so it stays put once positioned.

Good for: anyone who’s on video calls regularly and wants the most natural, professional-looking light. Watch out for: it’s heavier than a standard desk lamp, so it’s not something you’ll want to move around often.

2. Clamp-Mounted Double-Sided LED Panel Lamp — Best Clamp-On

This is the clamp-mounted sibling to the top pick, with the same soft, double-sided, shadow-erasing light in a space-saving format. Instead of taking up desk real estate with a base, it clamps to the edge of your desk or shelf, freeing up the entire surface. It keeps the same knob remote for precise, stepless brightness and color temperature control.

Good for: small or cluttered desks where every inch of surface space matters. Watch out for: needs a desk edge thin enough for the clamp to grip; check the clamp’s maximum thickness before buying.

3. USB-Powered Adjustable LED Desk Lamp — Best Budget Pick

You don’t need to spend much to get a noticeable upgrade over overhead room lighting. This simple lamp runs off USB power, so it plugs straight into a laptop or power bank, adjusts for height and angle, and offers a handful of color modes to switch between warmer and cooler light. It’s straightforward and effective, without any complicated setup.

Good for: budget-conscious buyers or anyone who wants a simple secondary lamp. Watch out for: the light spread isn’t as wide or evenly soft as the panel-style lamps, so you may get slight hotspots if you’re not positioned well.

4. Evershop Ring Light— Best for Small Desks

If desk space is genuinely tight, this tiny light sits on a mini tripod that fits unobtrusively in a corner. It’s a comparatively low-power 5W LED putting out around 220 lumens, not enough for a professional video shoot, but plenty for a Zoom call. It’s built from aircraft-grade aluminum rather than plastic, and can even attach to the back of a phone for calls taken on mobile.

Good for: tiny desks, dorm setups, or anyone who also takes calls from their phone. Watch out for: the low output means it won’t do much in a very dark room without at least some ambient light.

How to Choose the Right Video Call Lighting

  • Color temperature matters more than brightness. Neutral white light, roughly 3500-4000K, is generally recommended for video calls. Too warm (2700K) looks yellow and dim on camera, too cool (5000K+) looks harsh and blue.
  • Diffused, wraparound light beats a single hard source. A double-sided panel or diffused ring light fills in shadows evenly. A single small bulb aimed directly at your face tends to create harsh shadows on one side.
  • Position it in front of you, not behind. The light should sit facing you, ideally slightly above eye level, not behind your webcam or overhead where it casts shadows downward across your face.
  • Adjustability saves you from buying twice. A lamp with both brightness and color temperature control adapts to morning light, evening light, and different rooms, so you won’t need a second lamp for different conditions.

FAQ

Do I really need a separate lamp if my room has good lighting? If your room already has bright, even, front-facing light, you may not need one. But most rooms have overhead or side lighting that creates shadows on camera, which a dedicated lamp corrects in a way room lighting usually can’t.

Should I get a ring light or a desk lamp? Ring lights give a very even, shadow-free look and are popular with streamers, but can create a visible reflection in glasses. A double-sided panel lamp gives similarly soft light with less of that reflection issue, which is why it’s a common choice for daily video calls.

Where exactly should I place the lamp? Position it in front of you and slightly above eye level, angled down toward your face. Placing it too low can create an unflattering upward-lit look, and placing it directly behind your screen can wash out the camera.

Final Verdict

If you’re serious about how you look on camera, the double-sided LED panel lamp with a knob remote is worth the investment, it’s the closest thing to studio-quality lighting for a home desk. If desk space is at a premium, the clamp-mounted version gives you the same light without eating into your workspace. For an easy, low-cost upgrade, the USB-powered lamp is a solid starting point. And if your desk is genuinely tiny, the Harlowe Sol 5 Spectra fits almost anywhere.

Best Ergonomic Mouse for Small Hands

Disclosure: This post contains affiliate links. As an Amazon Associate, we earn from qualifying purchases at no extra cost to you.

Most mice on the market are designed around average or larger hand sizes, which leaves anyone with smaller hands stretching their fingers, resting their palm awkwardly on the back edge, or gripping too tightly just to hit the buttons comfortably. Over a full workday, that adds up to real fatigue in the thumb and wrist. The fix isn’t just “buy a smaller mouse”, shape and grip width matter as much as overall length. Here are the mice that actually fit smaller hands well.

Quick Picks

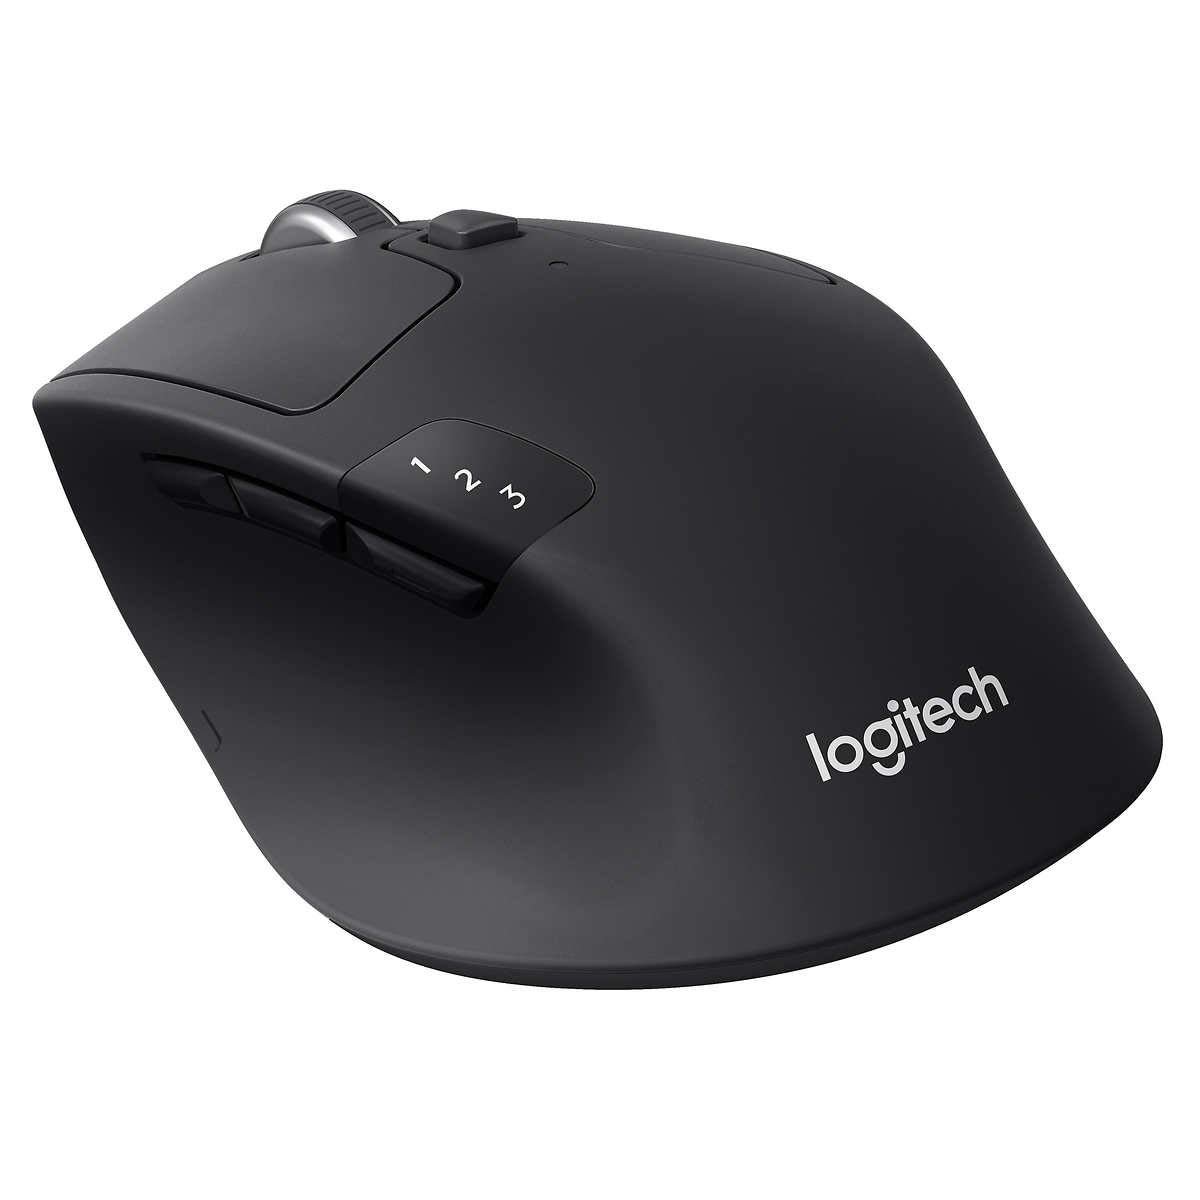
  • Best Overall: Logitech M720 Triathlon
  • Best Ultra-Compact: Razer Pro Click Mini
  • Best Vertical Design: Contour UniMouse Small
  • Best Budget Pick: Anker Vertical Ergonomic Mouse

1. Logitech M720 Triathlon — Best Overall

This is the mouse we’d recommend to most people with smaller hands who want something reliable rather than a specialty shape. Its compact, low-profile body sits comfortably under a smaller palm without forcing a stretch, and it still packs six customizable buttons and the ability to pair with up to three devices and switch between them instantly. Battery life runs up to two years on a single AA, so it’s not something you’ll think about often.

Good for: anyone who wants a normal-looking, comfortable mouse without a big learning curve. Watch out for: it’s not a specialty ergonomic shape, so it won’t help as much with existing wrist pain as a vertical mouse would.

2. Logitech Pebble Wireless Mouse — Best Ultra-Compact

At around 100mm long, this is genuinely one of the smallest full-featured mice you can buy, which makes it a strong pick if a standard-size mouse still feels too big in your hand. Despite the tiny footprint it keeps a capable sensor, seven programmable buttons, and both wireless and Bluetooth connectivity, plus it’s ambidextrous, so it works whichever hand you use.

Good for: smaller hands that find even “compact” mice too large, or anyone who wants something travel-friendly. Watch out for: the very small size can feel cramped for people with medium-to-large hands, so it’s specifically a small-hand pick.

3. Contour UniMouse Small — Best Vertical Design

If a flat mouse causes wrist or forearm pain, a vertical mouse keeps your hand in a more natural handshake position instead of twisting your forearm flat. The UniMouse stands out because its hinge angle adjusts anywhere from 35 to 70 degrees, so you can dial in exactly how vertical you want it, and the small size specifically fits smaller hands rather than being a scaled-down version of a large mouse. A five-way adjustable thumb rest adds extra support.

Good for: people dealing with existing wrist or forearm discomfort who want a genuinely ergonomic shape. Watch out for: vertical mice take a few days to get used to if you’ve never used one before.

4. Anker Vertical Ergonomic Mouse — Best Budget Pick

You don’t need to spend a lot to try a vertical, small-hand-friendly shape, and this is the mouse that proves it. It has a fixed 57-degree vertical angle that reduces forearm twisting, a compact body that suits smaller hands, and adjustable DPI for switching between precise and fast cursor movement. It won’t have the premium build or adjustability of the Contour, but it delivers the core ergonomic benefit at a fraction of the price.

Good for: anyone who wants to try a vertical ergonomic mouse without committing to a premium price. Watch out for: the angle is fixed, not adjustable, so it’s a one-size-fits-most solution rather than a custom fit.

How to Choose the Right Mouse for Small Hands

  • Measure your hand, not just “small” vs “large”. Measure from the base of your palm to the tip of your middle finger. As a rough guide, a mouse length of about 115-122mm tends to suit smaller hands best, while anything over 125mm often leaves the palm resting on the back edge instead of properly cradled.
  • Check grip width too. A narrower grip width, roughly under 60mm at the point where your thumb and ring finger rest, keeps your fingers from spreading too wide, which reduces strain at the base of the thumb.
  • Know your grip style. Palm grip rests your whole hand on the mouse and usually wants a shorter, curved shape. Claw and fingertip grips work well with smaller, lighter mice since less of the hand touches the surface.
  • Flat vs. vertical isn’t about hand size alone. Vertical mice help most with existing wrist or forearm discomfort, regardless of hand size. If you have no pain currently, a well-fitted flat mouse is often the easier adjustment.

FAQ

Are vertical mice actually better for small hands? Not automatically, size and shape matter more than orientation. A well-fitted flat mouse in the right size can be just as comfortable as a vertical one. Vertical designs specifically help if you have existing wrist or forearm strain from twisting your arm flat.

Do gaming mice work well for small hands too? Some do. Many gaming mice are designed lighter and more compact than office mice, so a few of them fit smaller hands well, but check the specific length and grip width rather than assuming based on the gaming label.

How long does it take to adjust to a vertical mouse? Most people report the hand and shoulder feeling more relaxed within the first week of regular use. Expect a short adjustment period where clicking accuracy feels slightly off before it becomes natural.

Final Verdict

The Logitech M720 Triathlon is the safest first buy for most smaller hands: comfortable, familiar, and reliable. If a standard-size mouse still feels too big, size down further with the Razer Pro Click Mini. If you’re dealing with existing wrist or forearm discomfort, the Contour UniMouse Small is worth the extra cost for its adjustable angle. And if you just want to test whether a vertical mouse helps before spending much, start with the Anker.

Best Cable Management Kits for a Clean Desk

Disclosure: This post contains affiliate links. As an Amazon Associate, we earn from qualifying purchases at no extra cost to you.

If your desk looks like a nest of power cords, charging cables, and monitor wires, you’re not alone. Tangled cables aren’t just ugly, they snag when you move your chair, make it harder to add or swap devices, and turn a five-minute task into an afternoon of untangling. A proper cable management setup usually isn’t one product, it’s a small combination: something to hide the bulk, something to route individual cables, and something to bundle what’s left. Here’s what actually works.

Quick Picks

  • Best Overall: VIVO Under Desk Cable Management Tray
  • Best All-in-One Kit: N NOROCME Cable Management Kit
  • Best for Wall-Mounted Monitors: Delamu Cord Cover Raceway
  • Best for Standing Desks: Magnetic Cable Clip System

1. VIVO Under Desk Cable Management Tray — Best Overall

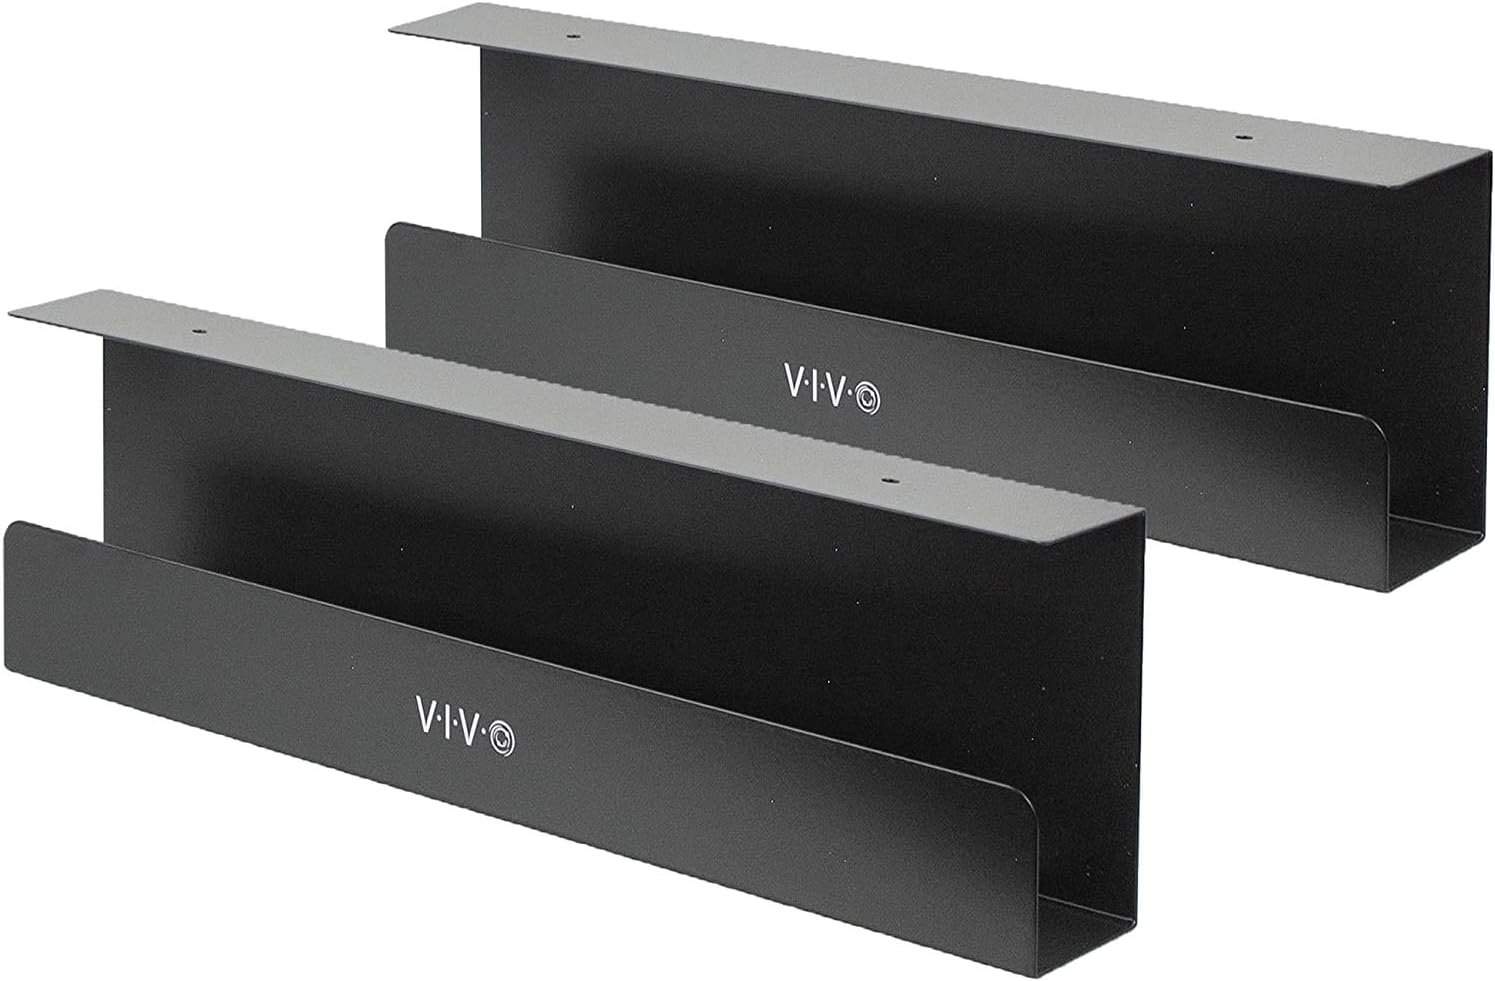
This is the tray recommended most often in desk setup communities, and for good reason. It’s a sturdy steel mesh basket that mounts under your desk with included screws, runs about 16 inches long, and holds a surprising amount: power strip, adapters, and cable bulk all in one hidden spot. It’s cheap, simple, and handles the large majority of the mess by itself.

Good for: anyone with a standard wood desk who wants one product that solves most of the clutter. Watch out for: it requires screwing into the underside of your desk, so it’s not ideal for rented furniture.

2. N NOROCME Cable Management Kit — Best All-in-One Kit

If you’re starting from zero and want to fix your entire setup in one afternoon, this is the kit to grab. It bundles cable clips, cable ties, self-adhesive mounts, cord organizer clips, and cable sleeves, essentially everything a first-time cable manager needs, in one box. At roughly 130+ pieces for well under $20, it costs less than buying each item separately.

Good for: first-time cable managers who want one purchase that covers everything. Watch out for: individual pieces are less heavy-duty than dedicated single-purpose products.

3. Delamu Cord Cover Raceway — Best for Wall-Mounted Monitors

If you’ve mounted a monitor or TV on the wall, you need a way to hide the cable running down to the desk or outlet, and this paintable channel does exactly that. Mount the base along the wall with the included adhesive, run your HDMI and power cables inside, then snap the cover on. Paint it to match your wall and the cable essentially disappears. It comes in a long run (around 157 inches), enough to cover most rooms with extra to spare.

Good for: hiding cables from wall-mounted monitors or TVs for a clean, finished look. Watch out for: adhesive mounting can damage paint on removal; renters should look for a screw-mount version instead.

4. Magnetic Cable Clip System — Best for Standing Desks

Standard cable trays and clips work fine on a fixed desk, but a height-adjustable desk moving up and down repeatedly turns a snagged cable into a real hazard, not just a mess. Magnetic cable systems solve this with clips, tracks, or modular channels that hold cables against the steel frame of your desk legs and simply let go as the desk moves. You’ll need clear space along the leg and a flat-sided steel frame for the magnets to grip properly.

Good for: anyone with a sit-stand desk who needs cables to move safely with the desk. Watch out for: won’t work on desks without an exposed steel frame for the magnets to attach to.

How to Choose the Right Cable Management Setup

  • Think in layers, not one product. Most clean desks use a tray to hide the bulk, clips or raceways to route individual cables, and ties or sleeves to bundle what’s left. Trying to solve everything with one item usually leaves gaps.
  • Fixed desk vs. standing desk. A screwed-in tray is fine for a desk that never moves. If your desk height-adjusts, use magnetic or slack-friendly systems instead, since rigid mounts can snag or pull loose as the desk travels.
  • Renting vs. owning. Screw-mounted trays and adhesive raceways aren’t ideal if you can’t modify the desk or walls. Look for clamp-on trays and screw-mount (rather than adhesive) raceway versions instead.
  • Measure before you buy. Check the length of your desk and the clearance under it before ordering a tray, and measure wall runs before ordering a raceway. Most returns in this category come from buying the wrong size.

FAQ

Where should I start if I have zero cable management right now? Start with an under-desk tray for the bulk (power strip and adapters), then add basic adhesive clips to route the cables you use most often. That combination solves the majority of visible clutter for under $30 total.

Do I need special tools to install a cable tray? Most trays come with the screws and a simple mounting bracket, and only need a screwdriver or drill. Clamp-on versions need no tools or drilling at all.

Will cable management damage my desk? Screw-mounted trays leave small holes in the underside of the desk, which usually isn’t visible day to day. If that’s a concern, clamp-on trays and adhesive clips avoid any permanent modification.

Final Verdict

For most desks, start with the VIVO Under Desk Cable Management Tray, it solves the biggest part of the problem on its own. If you’re setting up from scratch and want everything in one order, the N NOROCME kit is the better value. Add the Delamu raceway if you have a wall-mounted monitor, and switch to a magnetic clip system if your desk is height-adjustable. Combine a tray with clips or a raceway and most desks go from chaotic to clean in an afternoon.

Best Laptop Stands for Bed and Couch Work

Disclosure: This post contains affiliate links. As an Amazon Associate, we earn from qualifying purchases at no extra cost to you.

Working from bed or the couch feels comfortable until your laptop starts overheating on the duvet, your neck aches from looking down, or the whole thing slides off your lap the moment you shift position. Soft surfaces block the air vents underneath most laptops, and a thin ultrabook on a blanket can run 15-25°C hotter than the same laptop on a hard desk, which is close to where thermal throttling kicks in. The stands below solve that, plus the ergonomics of typing while reclined.

Quick Picks

  • Best Overall: LapGear Home Office Lap Desk
  • Best Adjustable: SAIJI Adjustable Laptop Stand
  • Best Budget Pick: AVAWING Laptop Bed Table
  • Best for Serious Couch Workers: Seville Classics Adjustable Laptop Cart

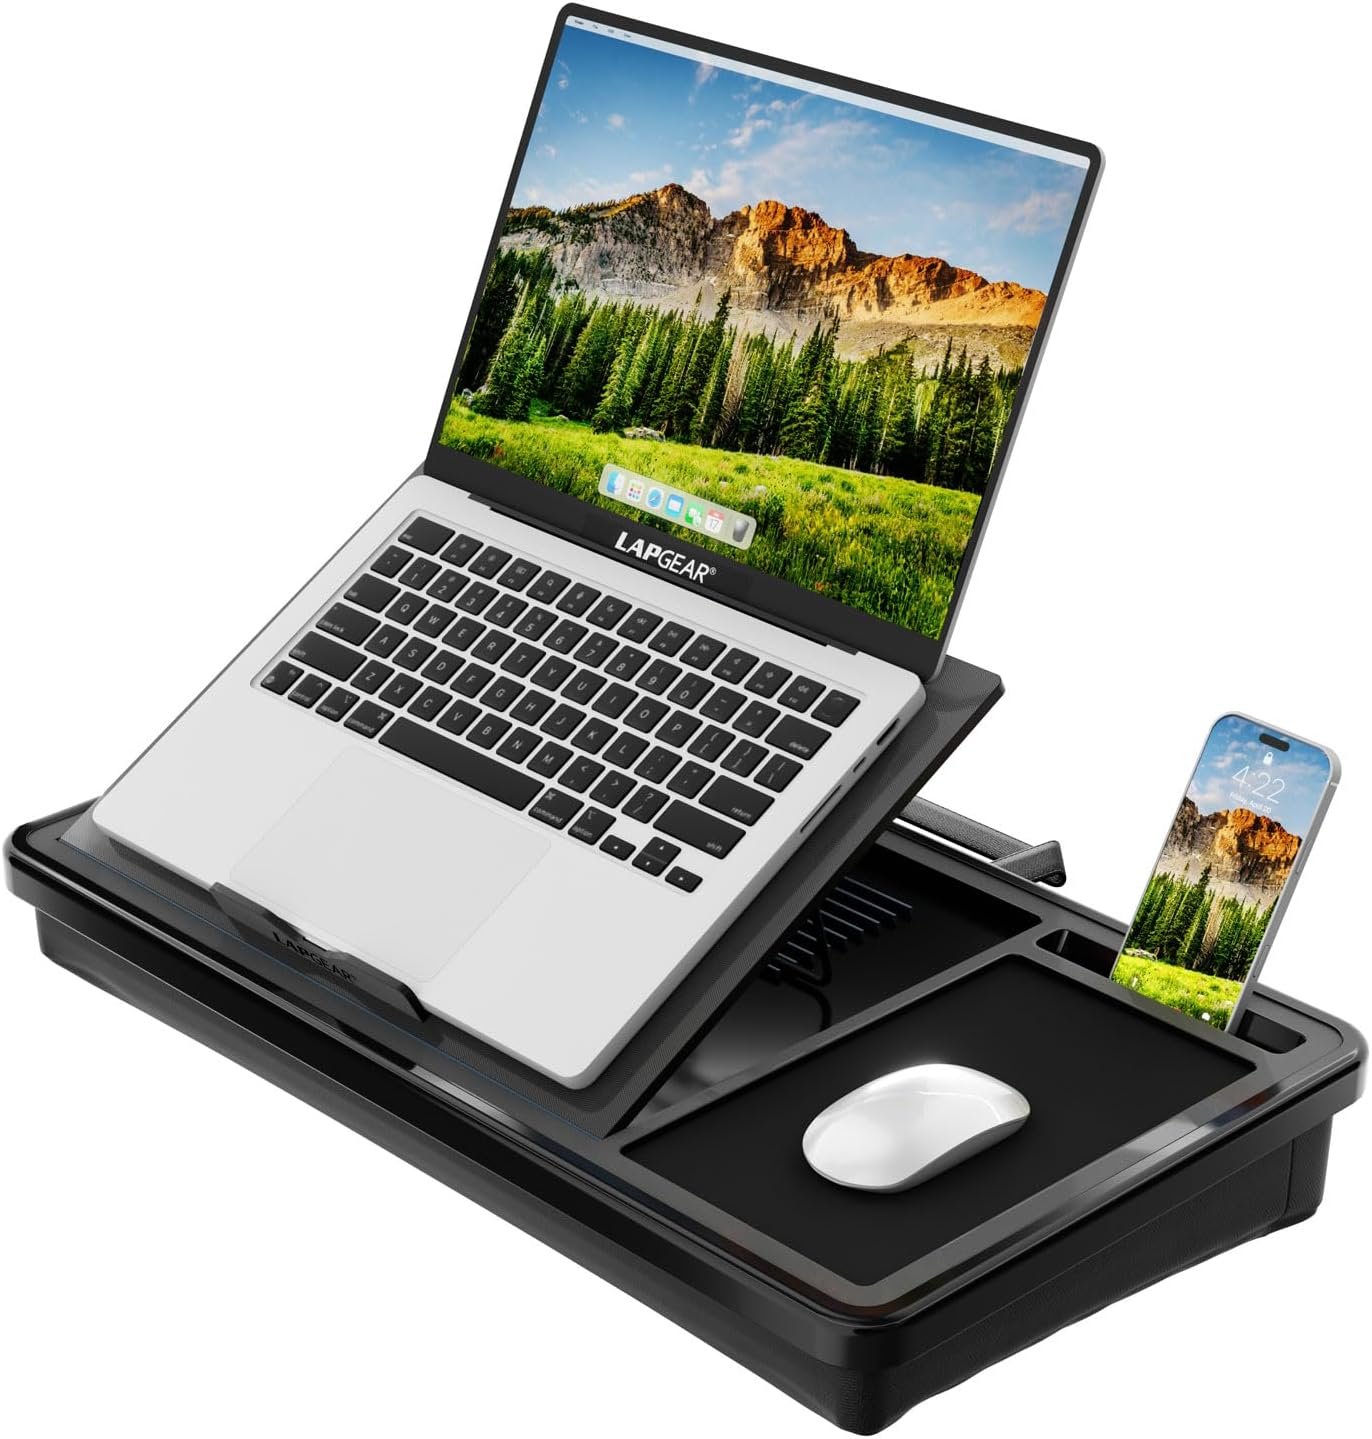
1. LapGear Home Office Lap Desk — Best Overall

LapGear Home Office Lap Desk with cushioned base

This is the one to buy if you just want something that works well every time without thinking about it. A cushioned underside conforms to your legs on the couch or in bed, while a hard top surface keeps the laptop level even if you shift around. Small standoffs under the platform restore airflow so the laptop isn’t smothered by a blanket, a front ledge stops thin ultrabooks from sliding off, and a side slot holds your phone upright.

Good for: anyone who wants one reliable lap desk for both bed and couch use. Watch out for: it’s a fixed flat surface, not height-adjustable, so it won’t raise the screen to eye level.

2. SAIJI Adjustable Laptop Stand — Best Adjustable

SAIJI Adjustable Laptop Stand with auto-lock height buttons

If you switch between sitting upright against a headboard and lying back on the couch, a fixed flat lap desk won’t cut it. The SAIJI has auto-lock height buttons giving you a range from about 10.6 to 15.4 inches, plus adjustable surface angle, so you can actually bring the screen closer to eye level instead of always looking down. The top is PVC leather for grip, and there’s a small storage drawer for cables or a mouse.

Good for: people who work from multiple positions and want the screen at a better angle. Watch out for: it’s noticeably heavier than a simple lap desk, so it’s not something you’ll want to move around often.

3. EHO Laptop Lap Pad — Best Budget Pick

EHO Laptop Lap Pad, budget foldable stand

A simple, foldable table with adjustable legs that covers most of what people actually need: a flat, elevated surface that keeps the laptop off soft bedding. It folds flat for storage under the bed or couch when not in use, and the legs adjust to work for both seated and reclined positions. It won’t feel as premium as the pricier picks, but it solves the core airflow and stability problem for very little money.

Good for: casual bed and couch use on a tight budget. Watch out for: no cushioned underside, so it can feel less comfortable resting directly on your lap for long sessions.

4. Seville Classics Adjustable Laptop Cart — Best for Serious Couch Workers

Seville Classics Adjustable Laptop Cart on wheels for couch work

If you spend hours on the couch every day, nothing resting on your actual lap is going to be as ergonomic as this. It’s a rolling, height-adjustable cart with an H-shaped base that slides under the couch so the surface hovers directly over your lap, similar to a hospital bedside table. Height adjusts from about 20.5 to 33 inches, which covers low and high couches alike, and it brings the screen much closer to eye level than any lap desk can.

Good for: people who work from the couch regularly and want a genuinely ergonomic setup, not just a lap pad. Watch out for: it’s bulkier and needs floor space to roll and slide into position.

How to Choose the Right Bed or Couch Laptop Stand

  • Airflow matters more than people think. Look for standoffs, legs, or vented surfaces underneath the platform. Setting a laptop directly on a blanket blocks the intake vents and can trigger thermal throttling within 10-20 minutes of real use.
  • Match the stand to your posture. Sitting upright against a headboard needs a screen roughly 10-12 inches above the mattress to hit eye level. Sitting cross-legged needs less, around 6-10 inches. If you switch positions often, get something height-adjustable.
  • Cushioned base vs. hard legs. A cushioned underside is more comfortable directly on your lap but adds bulk. Folding legs are more compact and often adjustable, but rest more directly on your legs or the couch cushion.
  • Check the surface size. Make sure the platform fits your laptop with room to spare if you also want to rest a mouse or notebook beside it.

FAQ

Is it actually bad to use a laptop on a bed or couch? It’s fine occasionally, but regularly working directly on soft bedding blocks cooling vents and can shorten your laptop’s lifespan over time, plus it encourages poor neck and wrist posture. A stand with airflow and some height fixes both issues.

Do I need a cooling pad instead of a lap desk? A cooling pad with fans helps more with heavy workloads like gaming or video editing. For everyday browsing, writing, or video calls, passive airflow from a stand with standoffs is usually enough.

Will a lap desk work with a mouse? Most flat lap desks have enough surface area for a compact mouse next to the laptop. If you use a full-size mouse regularly, look for a model with extra side space or consider the rolling cart option instead.

Final Verdict

For most people splitting time between bed and couch, the LapGear Home Office Lap Desk is the safest buy: comfortable, stable, and solves the airflow problem without any setup. If you switch between sitting up and lying back often, the SAIJI’s adjustable height and angle make a real difference. On a tight budget, the AVAWING folding table covers the basics. And if the couch is genuinely your daily workspace, the Seville Classics cart is the only option here that gets the screen close to real desk-level ergonomics.

Best Monitor Stands for Dual Monitors

Disclosure: This post contains affiliate links. As an Amazon Associate, we earn from qualifying purchases at no extra cost to you.

Two monitors sitting on their factory stands almost always means a cluttered desk, mismatched heights, and screens that are too low for good posture. A proper dual monitor stand fixes all three at once: it clears desk space, aligns both screens at eye level, and lets you angle each one independently for coding, trading, or just watching a video on one side while you work on the other. Here are the stands worth buying, based on build quality, weight capacity, and how well they actually hold position over time.

Quick Picks

  • Best Overall: HUANUO FlowLift Dual Monitor Stand
  • Best Value: VIVO STAND-V002 Dual Monitor Desk Mount
  • Best Budget Pick: ErGear Dual Monitor Arm
  • Best for Large or Ultrawide Screens: VIVO Premium Aluminum Dual Monitor Mount

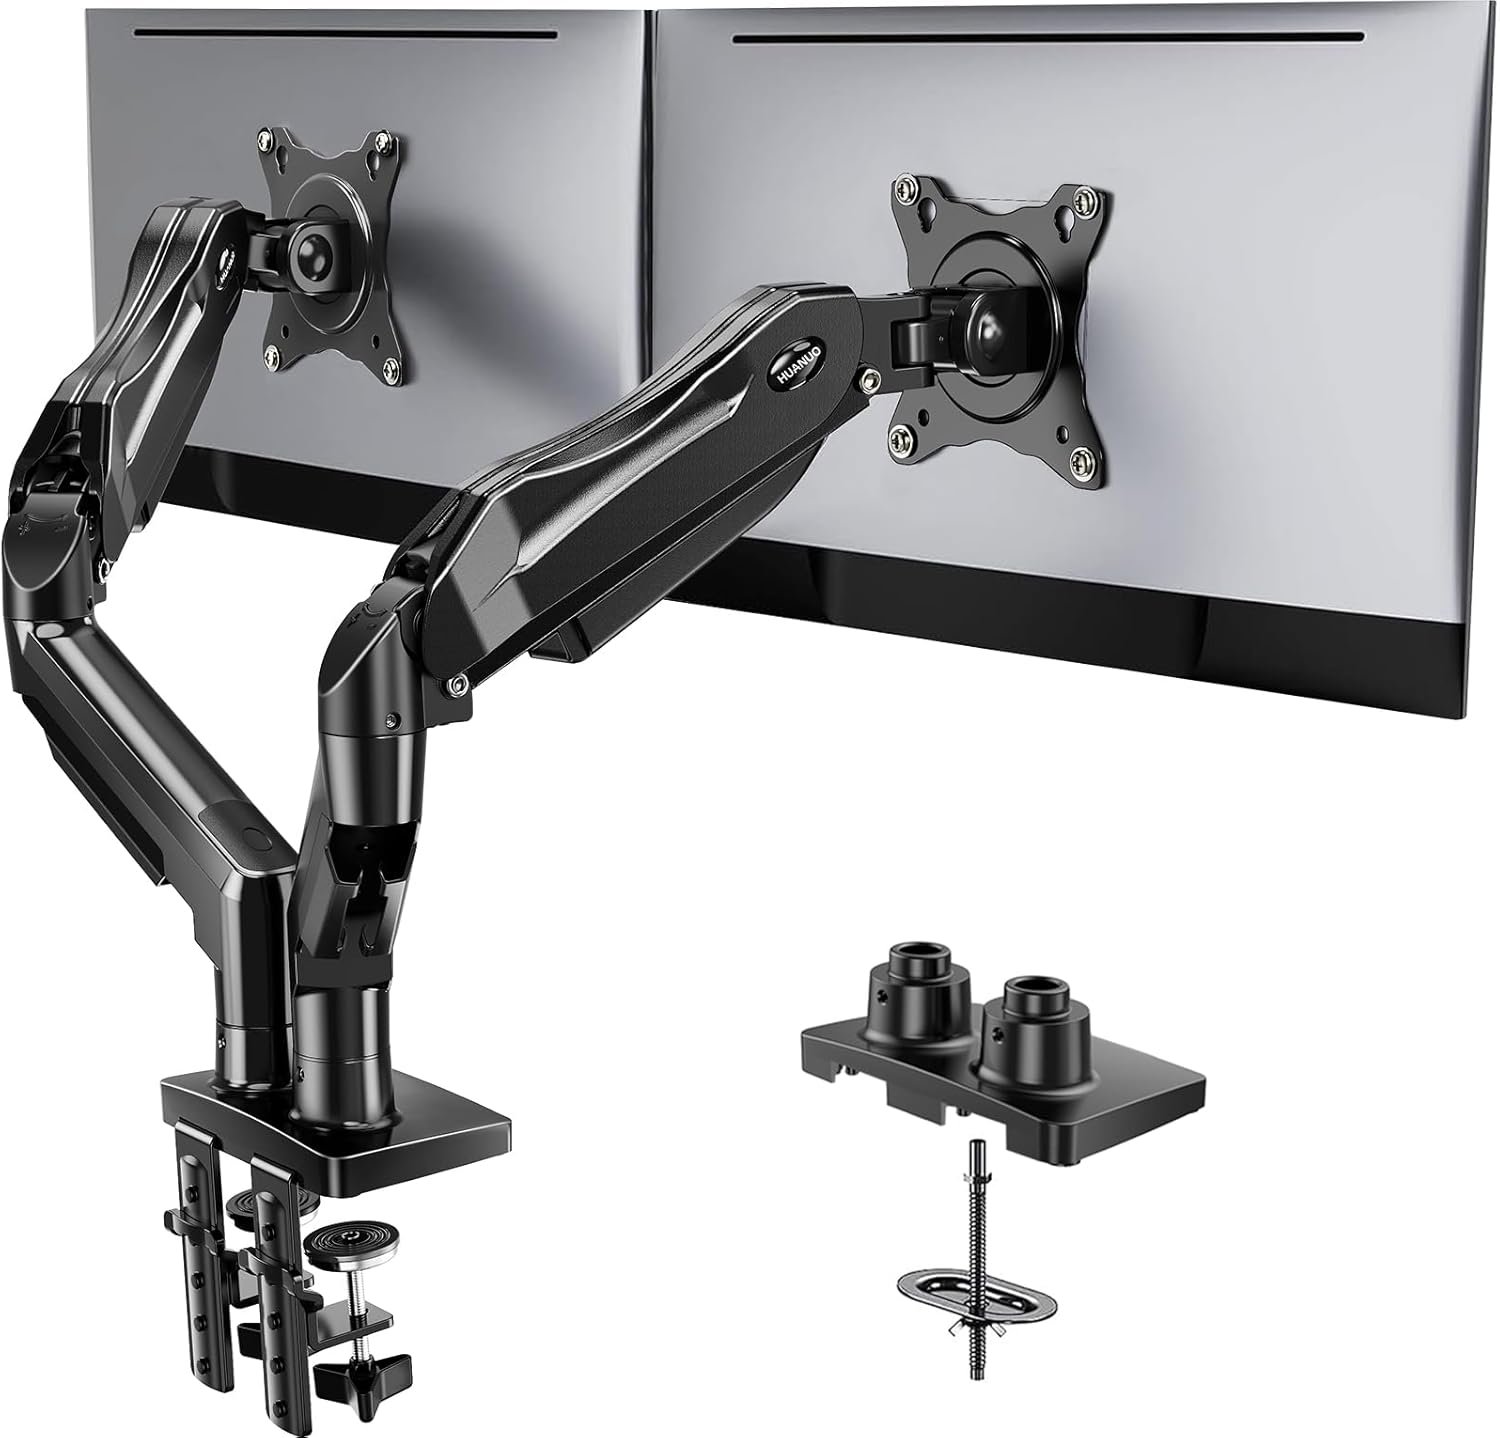
1. HUANUO FlowLift Dual Monitor Stand — Best Overall

HUANUO FlowLift Dual Monitor Stand with gas spring arms

This is the stand we’d point most people to first. It uses a gas spring mechanism, so once it’s tuned to your monitor’s weight, you can push a screen up, down, or sideways with one finger and it stays exactly where you leave it. It supports a wide range of monitor sizes on a standard VESA mount, includes both a desk clamp and a grommet base for different desk edges, and comes with a long warranty that reflects how well it holds up over time.

Good for: anyone who wants smooth, tool-free adjustment and full independent control of both screens. Watch out for: initial tension setup takes a few minutes of trial and error to match your specific monitor weight.

2. VIVO STAND-V002 Dual Monitor Desk Mount — Best Value

VIVO STAND-V002 Dual Monitor Desk Mount, heavy-duty steel

VIVO’s STAND-V002 has become a go-to recommendation because it’s genuinely heavy-duty steel construction at a price that undercuts most competitors. It holds two screens up to 30 inches and 22 lbs each, comes with both a C-clamp and grommet mounting option, and has years of reviews backing up its stability. It’s not the smoothest to adjust compared to gas spring arms, but it doesn’t sag or drift once positioned.

Good for: buyers who want rock-solid stability without paying gas-spring prices. Watch out for: adjustments require a bit more manual effort than premium arms.

3. ErGear Dual Monitor Arm — Best Budget Pick

ErGear Dual Monitor Arm, budget adjustable mount

If you just need two screens up off the desk without spending much, the ErGear arm gets the job done. It still delivers the core functionality: independent height, tilt, and swivel adjustment for each monitor on a standard VESA mount. Build quality is a step below the pricier options, but for a first dual monitor setup or a secondary desk, it’s a sensible way to start.

Good for: budget-conscious buyers setting up a second desk or trying dual monitors for the first time. Watch out for: heavier monitors may cause more drift over time than the pricier picks.

4. VIVO Premium Aluminum Dual Monitor Mount — Best for Large or Ultrawide Screens

VIVO Premium Aluminum Dual Monitor Mount for ultrawide screens

Most dual monitor stands aren’t rated for screens over 32 inches, which rules them out for ultrawide or large 4K displays. VIVO’s premium aluminum mount is built specifically for that heavier class of monitor, with a sturdier arm structure and a higher weight rating per side than standard steel arms. If you’re running two large or ultrawide screens, this is one of the few stands actually engineered to hold them without sagging.

Good for: setups with large, heavy, or ultrawide monitors that standard arms aren’t rated for. Watch out for: it costs more and needs more desk clearance than compact arms.

How to Choose the Right Dual Monitor Stand

  • Check your VESA pattern first. Almost all modern monitors support 75x75mm or 100x100mm VESA mounting holes on the back. Confirm yours before buying, since a stand is useless without a matching pattern.
  • Weigh your monitors, not just their screen size. Weight capacity is the spec that actually matters for stability. A 27-inch monitor can weigh anywhere from 10 to 20+ lbs depending on the panel, so check the actual weight rather than assuming based on size.
  • C-clamp vs. grommet mount. A clamp attaches to the edge of your desk and needs no drilling. A grommet base goes through a hole in the desk and sits flatter, but requires either an existing hole or drilling one. Most stands include both options.
  • Gas spring vs. mechanical adjustment. Gas spring arms move with one finger and hold position precisely, but cost more and need initial tension tuning. Mechanical or friction-based arms are cheaper and simpler, but need more effort to reposition.

FAQ

Will a dual monitor stand fit any desk? Most stands work with desks between roughly 0.4 and 3.5 inches thick using either a clamp or grommet base. Check the specific range listed for the stand you’re considering, especially with glass or very thick desks.

Can I mix two different monitor sizes on one stand? Yes, most dual arms adjust each side independently, so pairing a 24-inch and a 27-inch monitor is fine as long as both fall within the stand’s weight rating.

Do I need to drill a hole in my desk? No. Every stand on this list includes a clamp option that doesn’t require any modification to your desk. A grommet hole is only needed if you prefer that mounting style.

Final Verdict

The HUANUO FlowLift is the stand to buy if you want the smoothest experience and don’t mind paying a bit more. The VIVO STAND-V002 is the smarter pick if you want proven, heavy-duty stability at a lower price. If you’re just testing out a dual monitor setup for the first time, start with the ErGear arm. And if your screens are large or ultrawide, skip straight to the VIVO Premium Aluminum mount, since standard arms simply aren’t built to hold them.